hi there for people who might be interested here a relatively cheap TFT screen that people can use for OEM and smarthome control the ESP32-8048S070
this is a how to setup for squareline studio
first download the drivers for the board - you need to be patient they exceed the download limits daily so might take a couple days before you can download it
unzip it and copy all the libraries to Arduino IDE ( found in 1-demo folder ) - - just follow the directions in the User Manual found in the zip file. once you trialled run and you got the screen running properly with Lvgl examples: TFT-LVGL-Benchmark or TFT-LVGL-Widget . we can set up Squareline Studio
setting up the board for squareline studio:
download the sqarestudio driver i made for it : arduino_tft_espi esp32.zip (5.9 MB)
now this driver is missing some components as it is simply to big to upload here. unzip the driver,
in there you will see a zip file called arduino_tft_espi.zip. Open it with Ark and drag and drop the board’s library files into the folder called libraries add these → Arduino_GFX_master, Touch_GT911, and gt911_arduino-main ( you can add the others it will not hurt but not necessary )
now download a copy of Squareline studio. unzip it then copy the board driver to boards/Arduino/ ( if the folder Arduino is not present create it. then copy it into that folder )
if using a linux desktop and having issues starting it. the easiest way to get it to work is download version 1.0.5 start that first. leave it open. then start the newer one 1.2.3 (or you can hammer away at program it will start too but sometime it be quite a few clicks to get it running).
setting up a new project go to "create new " → Arduino you will see the board driver that you just installed click on it and then create.
after this go to Project setting and set up your paths and Call function export files → .cpp
now you are ready to create your interfaces
once you created your interface and you set up a button event (call function) to get it to work with Arduino IDE
First export your project 1st → Create template project 2nd → Export UI files
once they are exported go to where you exported them. open ui_events.cpp copy all the the Void (events) you created and copy and paste into ui.ino at the bottom. save and then delete or rename ui_events.cpp ( ui_events.cpp-bak) then load ui.ino into Arduino.IDE and add in all your other functions you want ie wifi , mqtt, etc …
smarthome-AI-textbox.zip (104.8 KB)
for those who might be interested here a release version of the screen
you can adapt to your needs easy enough - if you want to change names of switches and buttons it all found in ui.c
I ran out of widget space so I had to adapt… for hp and evac solar tubes to just program it to be sent to the AI text pox by switching aux 1 and aux to switch on the front screen ( or what ever data you want displayed there . it interacts with my opernwrt_ai program for full inhouse AI. also useful if you are some what hearing impaired or could not understand its reply as you can ask the AI questions and it will print it to the screen for your reading consumption. I probably adapt my mycroft recipe skill for my AI now . you can ask for recipes off the web and it just print the recipe to the screen for you . since my this smarthome screen is situated in my kitchen anyways
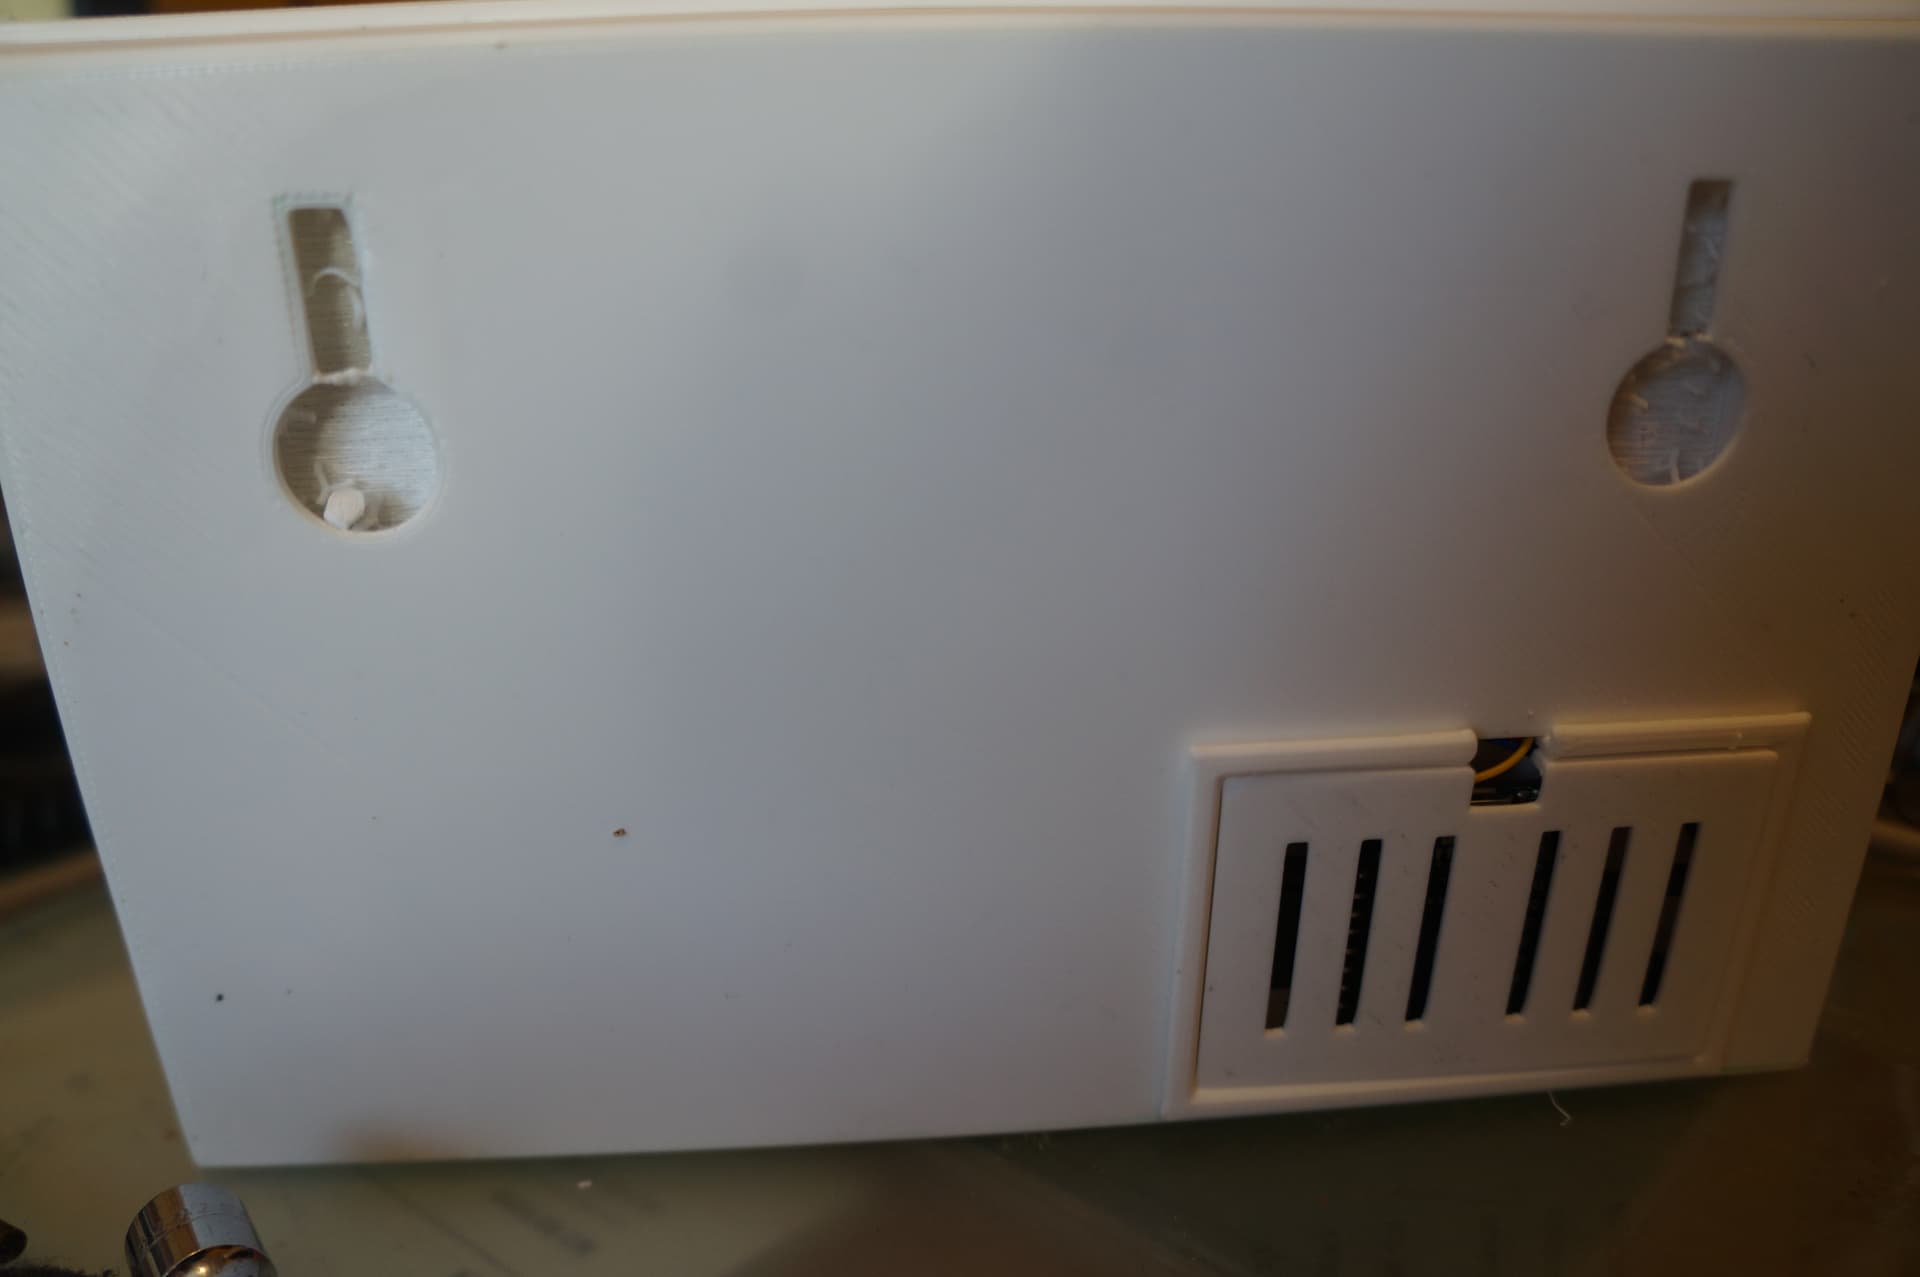
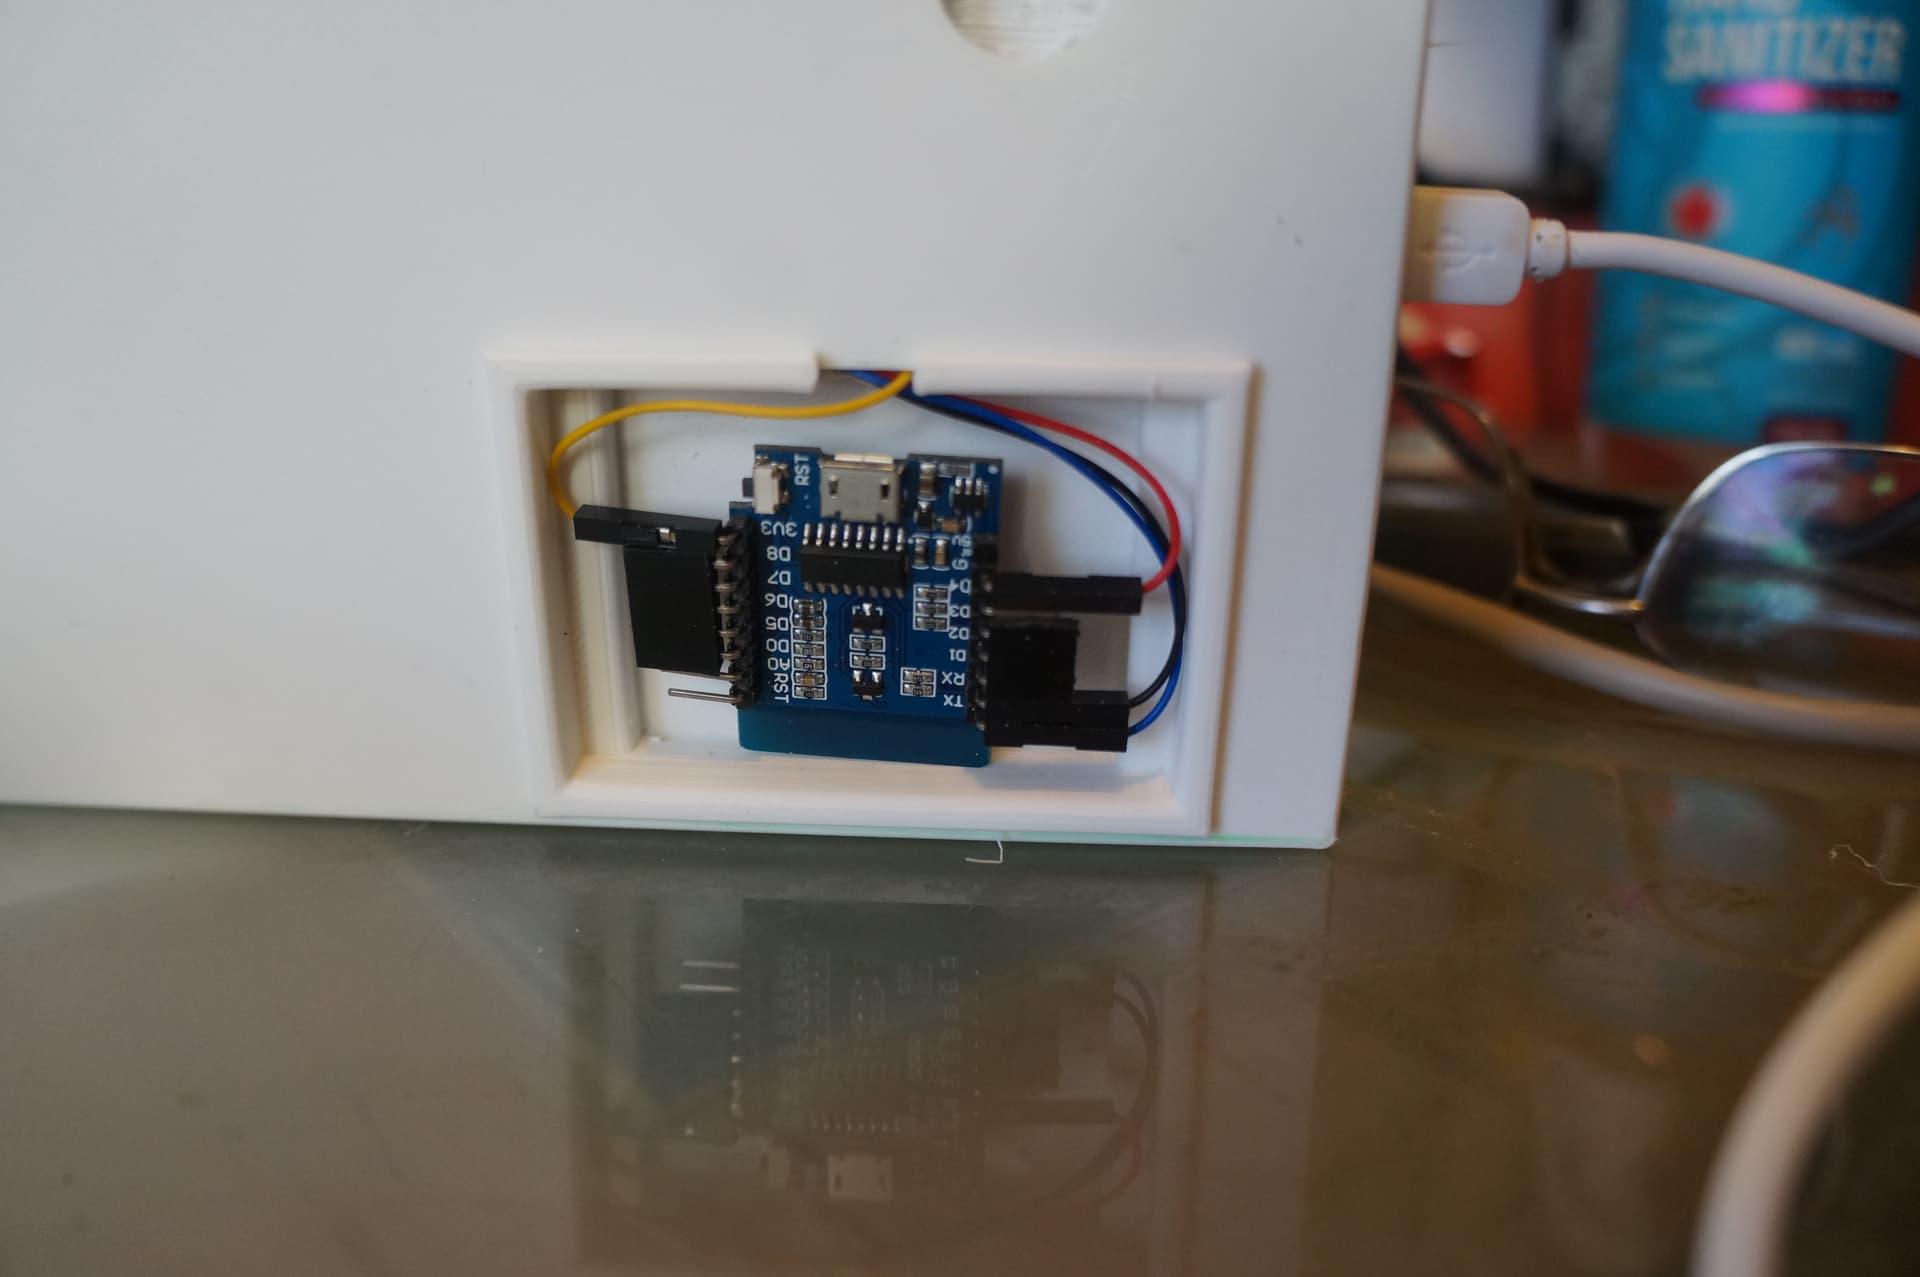
the access door is for an esp that i am using instead of the built in esp32 wifi as - it powered by the board p4 . the reason for it use is that it allow the screen to run smoothly with out wifi interruption causing the screen to freeze as i find esp wifi more stable then the esp32’s
Hello, thank you very much for the information, it has been very useful for me.
I am using the 7" screen. But I have a problem that is being in common with any example that brings the screen, also with the example of your interface and with some that I have made.
It is an error with the touch and it can be seen in the serial as the following:
[E][Wire.cpp:513] requestFrom(): i2cRead returned Error -1
I am not sure i had that error but I believe i did at first . I believe the touch screen still worked you just get the error … i down graded some of my software to work better with no errors . I am just not sure which one it was, again i think it was esp32 → 2.0.7 . or i commented out a line lvgl.conf file
also with this screen it does not play nice with the wifi or the bluetooth and lvgl and the touch the over lap . hence why i also do my wifi via a secondary basic esp. but I think you can remap some of the address to correct the issue I just have not tried, as the esp was a much easy and more stable solution
I followed all your steps, but the only issue i run into is this compiler error when trying to upload it to the ESP/screen:
c:/users/hobbybob/appdata/local/arduino15/packages/esp32/tools/xtensa-esp32s3-elf-gcc/esp-2021r2-patch5-8.4.0/bin/…/lib/gcc/xtensa-esp32s3-elf/8.4.0/…/…/…/…/xtensa-esp32s3-elf/bin/ld.exe: C:\Users\hobbybob\AppData\Local\Temp\arduino\sketches\6882FFFE99A5925A7CA9D33F17F37BB9\sketch\objs.a(ui.c.o):(.literal.ui_init+0xc): undefined reference to ui_Screen1_screen_init' c:/users/hobbybob/appdata/local/arduino15/packages/esp32/tools/xtensa-esp32s3-elf-gcc/esp-2021r2-patch5-8.4.0/bin/../lib/gcc/xtensa-esp32s3-elf/8.4.0/../../../../xtensa-esp32s3-elf/bin/ld.exe: C:\Users\hobbybob\AppData\Local\Temp\arduino\sketches\6882FFFE99A5925A7CA9D33F17F37BB9\sketch\objs.a(ui.c.o): in function ui_init’:
C:\Users\hobbybob\Desktop\ESP32S3 GUI arduino code\E2_ESP32S3_GUI\ui/ui.c:43: undefined reference to `ui_Screen1_screen_init’
collect2.exe: error: ld returned 1 exit status
Can you or anyone help me out with this? Would be highly appreciated!
EDIT: Nevermind, I just updated to Squareline studio 1.3.2 and clicked “Flat export (exports all files to one folder)” in File > Project Settings > FILE EXPORT. This fixed the problem because apparently Arduino does not look for source files in subfolders…
Hello
first of all thank you for your amazing work with driver for Square line studio, after few desparate nights in front of monitors I wanted to abandon my project and then tried your work and it uploaded sketch sucessfully to the display. huge succes.
I have one additional question, is it possible to rotate the display ? For my project I would need vertical orientation of display, but no matter what I tried to configure in squareline studio or in exported files, not getting rotated image or it is distorted.
you probably can not rotate my project but you can create a new project that is rotated. there was option when first setting up your new project where you change orientation. you could also load sample projects that came with squareline that were orientated in different orientations and they would load properly . ( sorry I have not used squareline lately so it going by memory) if you still having issue you can swap * width * and * height* parameters in the ino and touch.h making a 800x480 driver plus edit arduino_tft_espi.slb to reflect the changes that should also work
I tried 1.3.2 and 1.3.0, and it works now. In 1.5.0, there are only LVGL 8.3.6 and 8.3.11, which are unsupported. I think that’s why I can’t create a project. Thanks for answering!
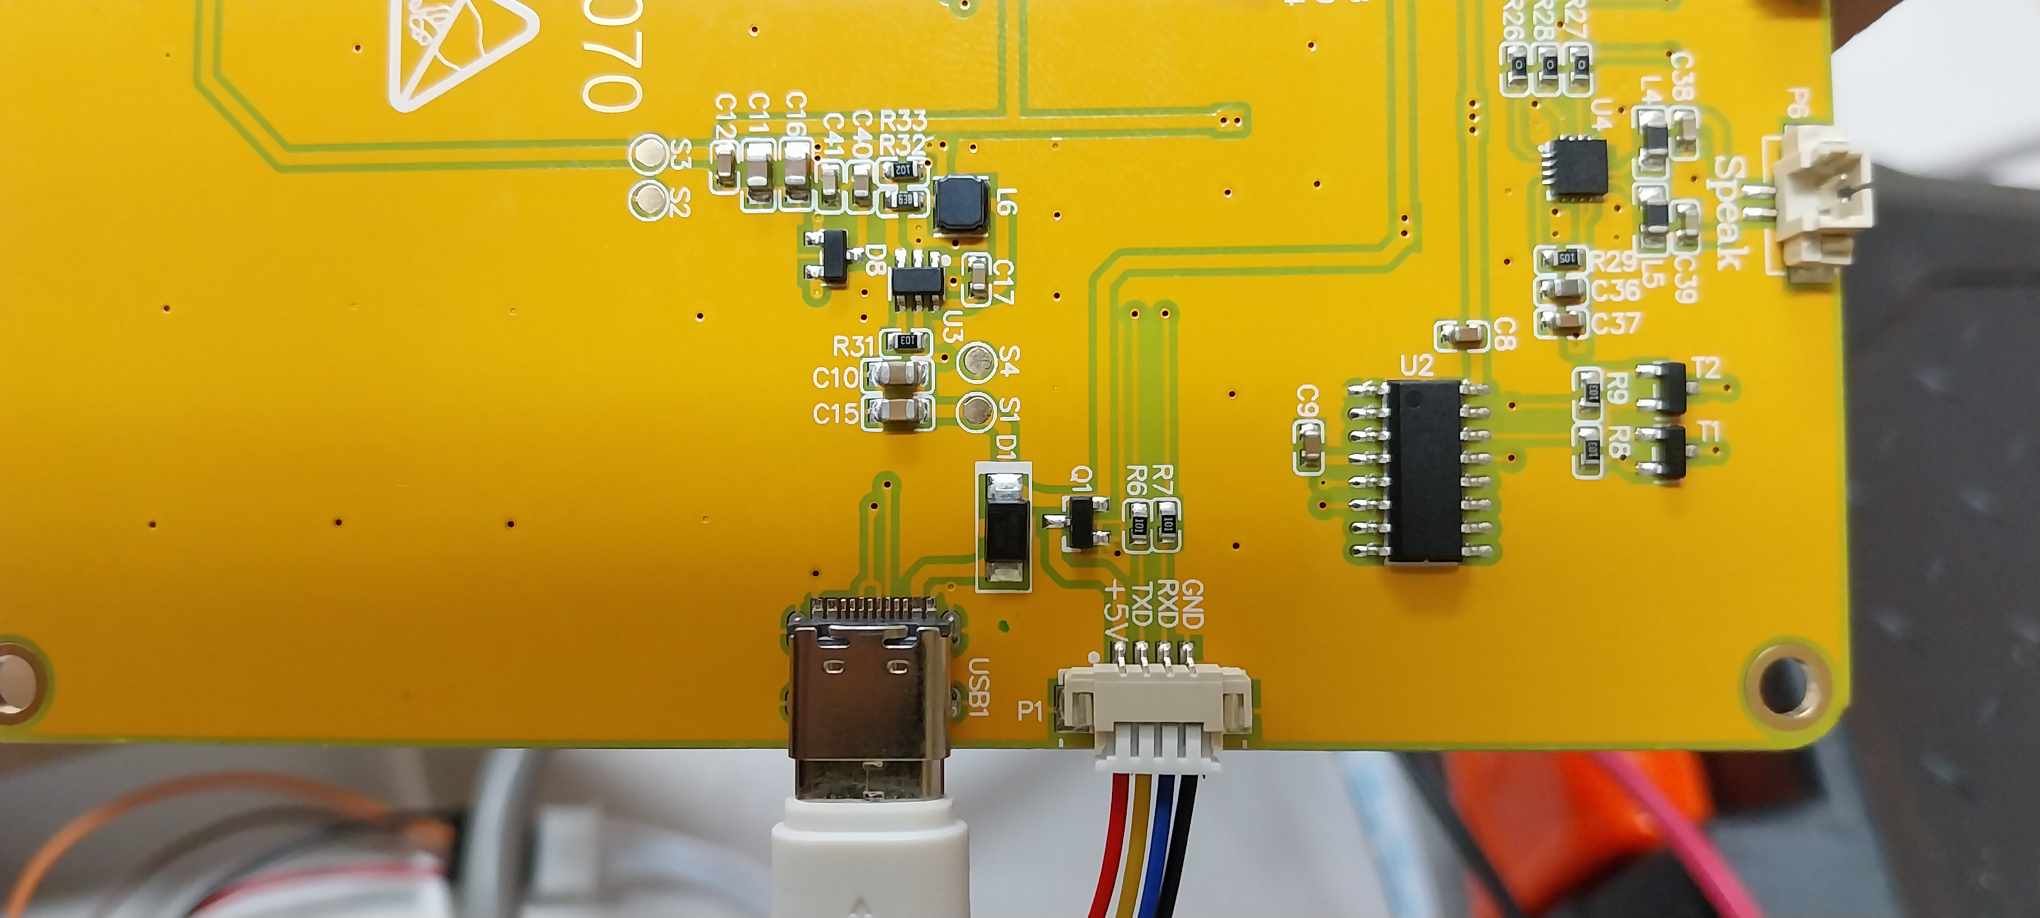
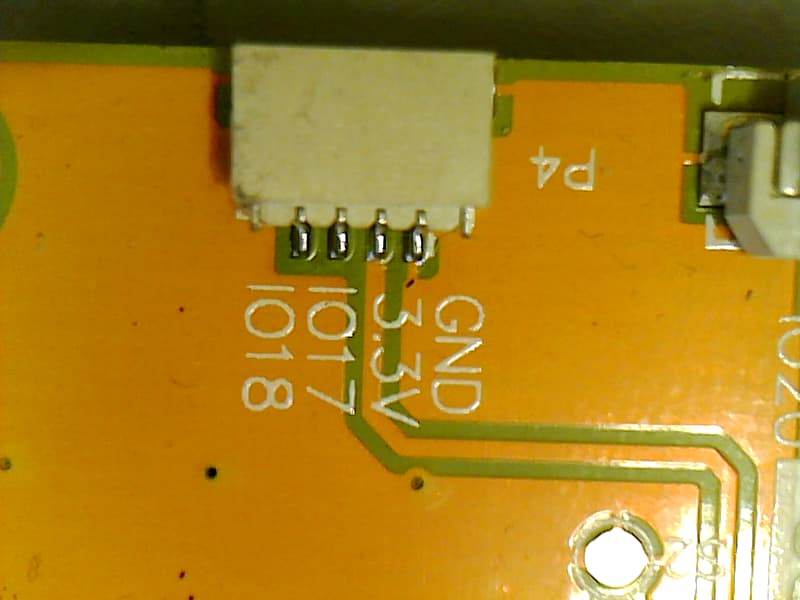
As in the image, there are 4 pins, which are 5V, GND, RXD, and TXD. I wonder what the RXD and TXD pins are. I need to use it to communicate with another ESP/Modbus for my project; right now I can’t figure it out yet. Thanks!
yes you can use it to communicate with an esp or other device. it 5v so some esp do not like 5 volt only 3.3v you need a voltage converter chip unless your ESP has one built in already or you can use a io port and software serial they are 3.3 volt
Have you used the RXD and TXD pins here? I want to know what GPIO of these RXD and TXD is. I have tried 36 and 37 in the schematic, which is UART0, and it still didn’t work, or maybe when I’m using the serial monitor, it blocks these UARTs from transmitting or sending data, and I tried 43 and 44 from the ESP32 S3 pinout and it still didn’t work, or my step is wrong; you can let me know. Thanks again for your help!
I am pretty sure this esp32 does not have voltage converter chip on it so you have to add one… but it be better to make a software serial port on the screan using this port
or what ever it might be on your screen size.
then just have tx from the screen got to rx on the ESP32 and the tx on the ESP32 go to the rx on the screen and use the screen to power the secondary esp32 that what i do for mine. though i use esp and not esp32