Thanks to a helpful customer for recording their experiance as an instructional accont for how to fit the IoTWatt wall mount:
How to fit the smaller part of the wall-mount bracket to the IoTaWatt unit.
-
Carefully remove the four rubber feet by pulling them out of their location socket and place them to one side.
-
Using a cruciform screwdriver remove the exposed screws at the bottom of each socket and place with the rubber feet.
-
Remove the base cover from the IoTaWatt unit.
-
Unpack the two parts of the wall-mount bracket along with the two fixing screws.
-
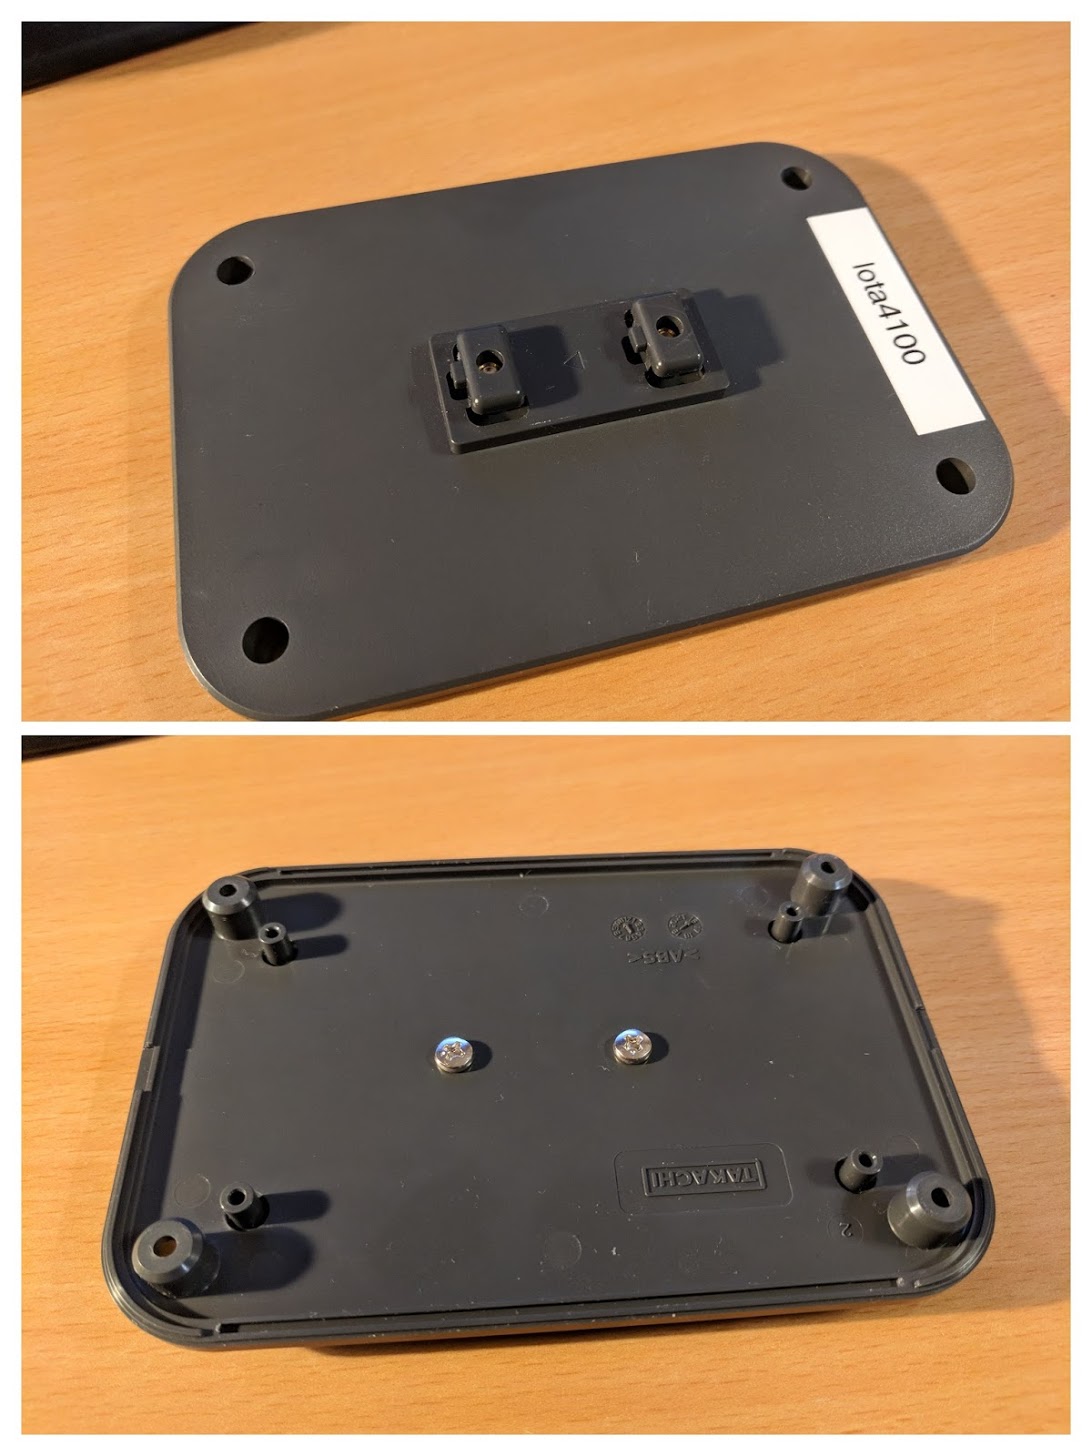
With the smaller part of the wall-mount bracket on the external surface of the base cover, and the triangle pointing towards the lower edge, turn the assembly over and align the fixing holes.
-
Insert a fixing screw into one of the threaded brass nuts and partially tighten.
-
Insert the second fixing screw into the other threaded brass nut and again partially tighten.
-
Finish tightening both fixing screws.
-
Refit the base cover ensuring the triangle on the wall-mount bracket is pointing towards the base of the IoTaWatt unit i.e. the end with the power socket connections.
-
Place a base plate fixing screw in each socket.
-
Using a cruciform screwdriver carefully engage each fixing screw with the thread that already exists and partially tighten.
-
Finish tightening all fixing screws.
-
Replace the four rubber feet.