I would like to create database for my LiFePO4 16 cells, so i could make real life charts and data look back at as long as couple months or even a year, but i have zero experience in MQTT or MySQL.
I have tried t do it the same with InfluxDatabase.
Watched a lot of videos, but just couldn`t get it working.
I have seen couple of good photos of other people charts/databases.
Maybe someone could make a video from start to end on how to create this for diyBMS?
I have tried to understand for more than a month, on how to create a database for my cells.
Hi Ako
Sorry I have no videos to share, but I can try to walk you through the basics.
First of all in your diyBMS I assume you have enabled Mqtt by entering the IP address of your raspberry Pi.
Now to send the messages to OpenEnergyMonitor in Node Red drag a ‘mqtt in’ box from the left hand side (in the Network section) and drop it into the work area. Double click on it to set it up and in the ‘Server’ box enter localhost:1883
If your mosquitto MQTT server has security enabled (sorry I do not remember if Openenergy monitor enables security on Mqtt out of the box) , click on the pencil icon just to the right of the Server box and select ‘Security’.
The default user is emonpi and the default password is emonpimqtt2016
Select ‘Update’ to exit the security settings.
Now to continue setting up ‘mqtt in’ in the box labelled ‘Topic’ enter diybms then select ‘Done’
Now drag a ‘debug’ box into the work area and draw a line from the mqtt output to the input of debug. (Note: The button at the right hand edge of the debug icon enables/disables debug messages)
Now you are ready to test out if you are receiving Mqtt messages from diyBMS. Select the ‘Bug’ icon in the top right of your screen. It is the funny looking one between the Book and the cog wheel icons. Then press the ‘Deploy’ button at the extreme top right.
If all is well you should start to see messages appearing in the right hand pane.
If that works go to the next step. Drag a ‘mqtt out’ box into the work area and draw a line from ‘mqtt in’ to ‘mqtt out’. Click on the ‘mqtt out’ box and set Topic to emon/diybms and select ‘Done’
Now click ‘Deploy’ once more and mqtt messages will be sent into OpenEnergy monitor.
Go to your emon page and select Setup>Inputs. You should see an input heading called diybms. Now you can set up feeds as per normal in emon.
One correction. Looking at the diyBMS code I see it has changed since I last forked it. For the ‘mqtt in’ box use the Topic ‘diybms/#’ The ‘#’ means all sub topics below the main one. That will get all the messages from diyBMS.
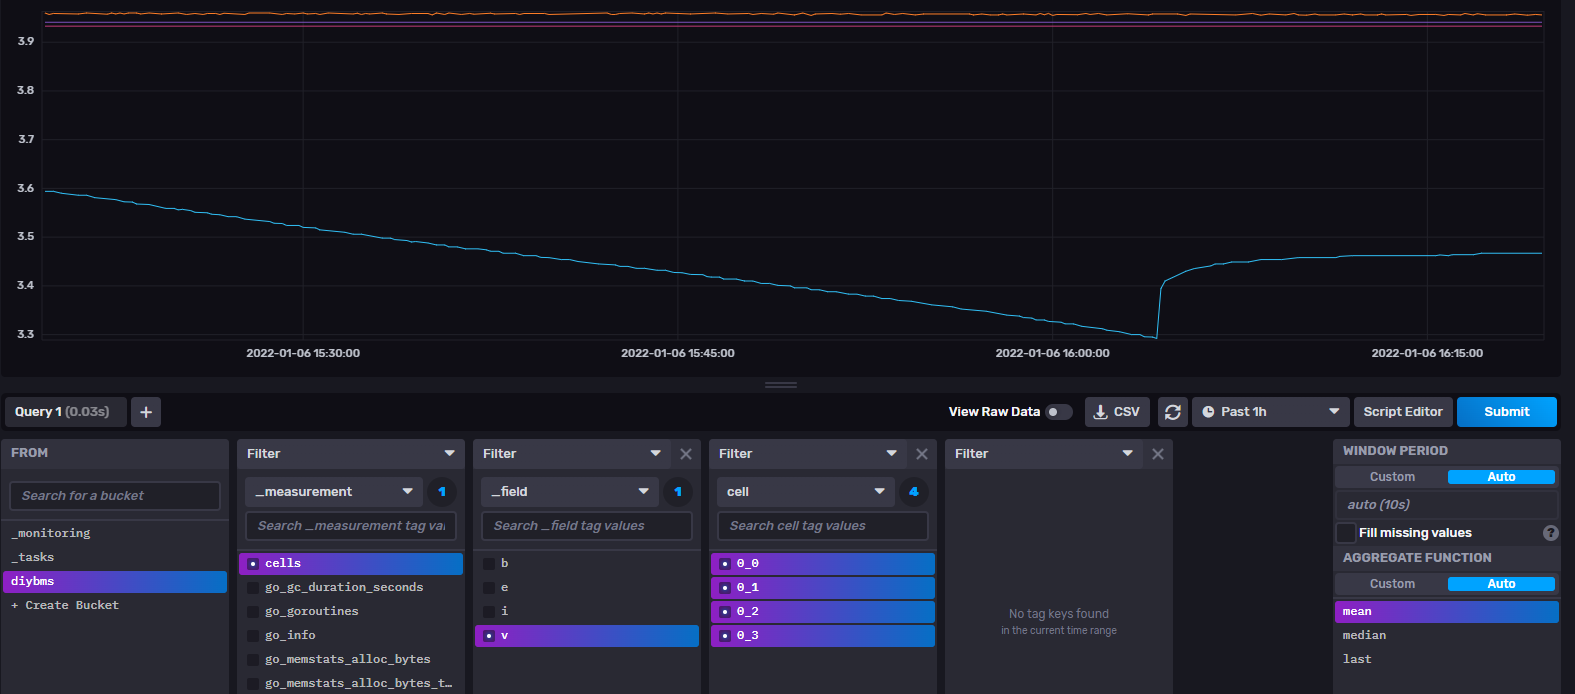
I just set up my influxdb and is sending data from my diybms. I can explain the basic steps of what I did and maybe it helps. I was totally new to influxdb before.
Create an influx database. You can find a guide here Install InfluxDB | InfluxDB OSS 2.1 Documentation, but basically. Download it, extract it and start the exe file from the cmd (if you are using windows). Once it is started you can configure it through your browser using the address localhost:8086. Then setup up login, choose an organization name and a bucket name. That is all you need to begin with.
Set up your controller to send data. Login to your diybms controller and go to More–> Integration.
Here you enable InfluxDB. Then fill in the fields.
“Influx DB write API URL”: Use the example “http://192.168.0.49:8086/api/v2/write” but you need to change the IP to the computer hosting your db. You can check this with ipconfig command in cmd an look for IPv4 address.
“API authentication token”: This you can create/find in the influxdb GUI Data–> API Tokens.
“Influx DB 2 organization id”: This id you can also find in the influxdb GUI. On your homepage address ex:http://localhost:8086/orgs/732e70fb64a9155b, then it is the 732e70fb64a9155b part that is the org id.
“Bucket or database name”: just the name of the bucket you choose when you first setup influx db.
Then save the settings and restart the controller.
If everything is done right you should be able to query cell data in influxdb. So go to Data–>Buckets–> “your bucket” then under filter _measurements you should find “cells”