EmonTX to Rpi - Direct Serial Connection

OK, the 3 × 2 pin header. I’ve changed it. I think it’s for Atmel’s programmer.

1 Like

Pi Zeros work fine - my local emoncms has been on a v1.3 one for a long time. After all there’s a lot of processor there doing very little most of the time.

1 Like

Running emonhub as well or just emonCMS?

Yes, emonhub and MQTT and nodered.

Here’s a netdata snapshot

1 Like

Good to know.

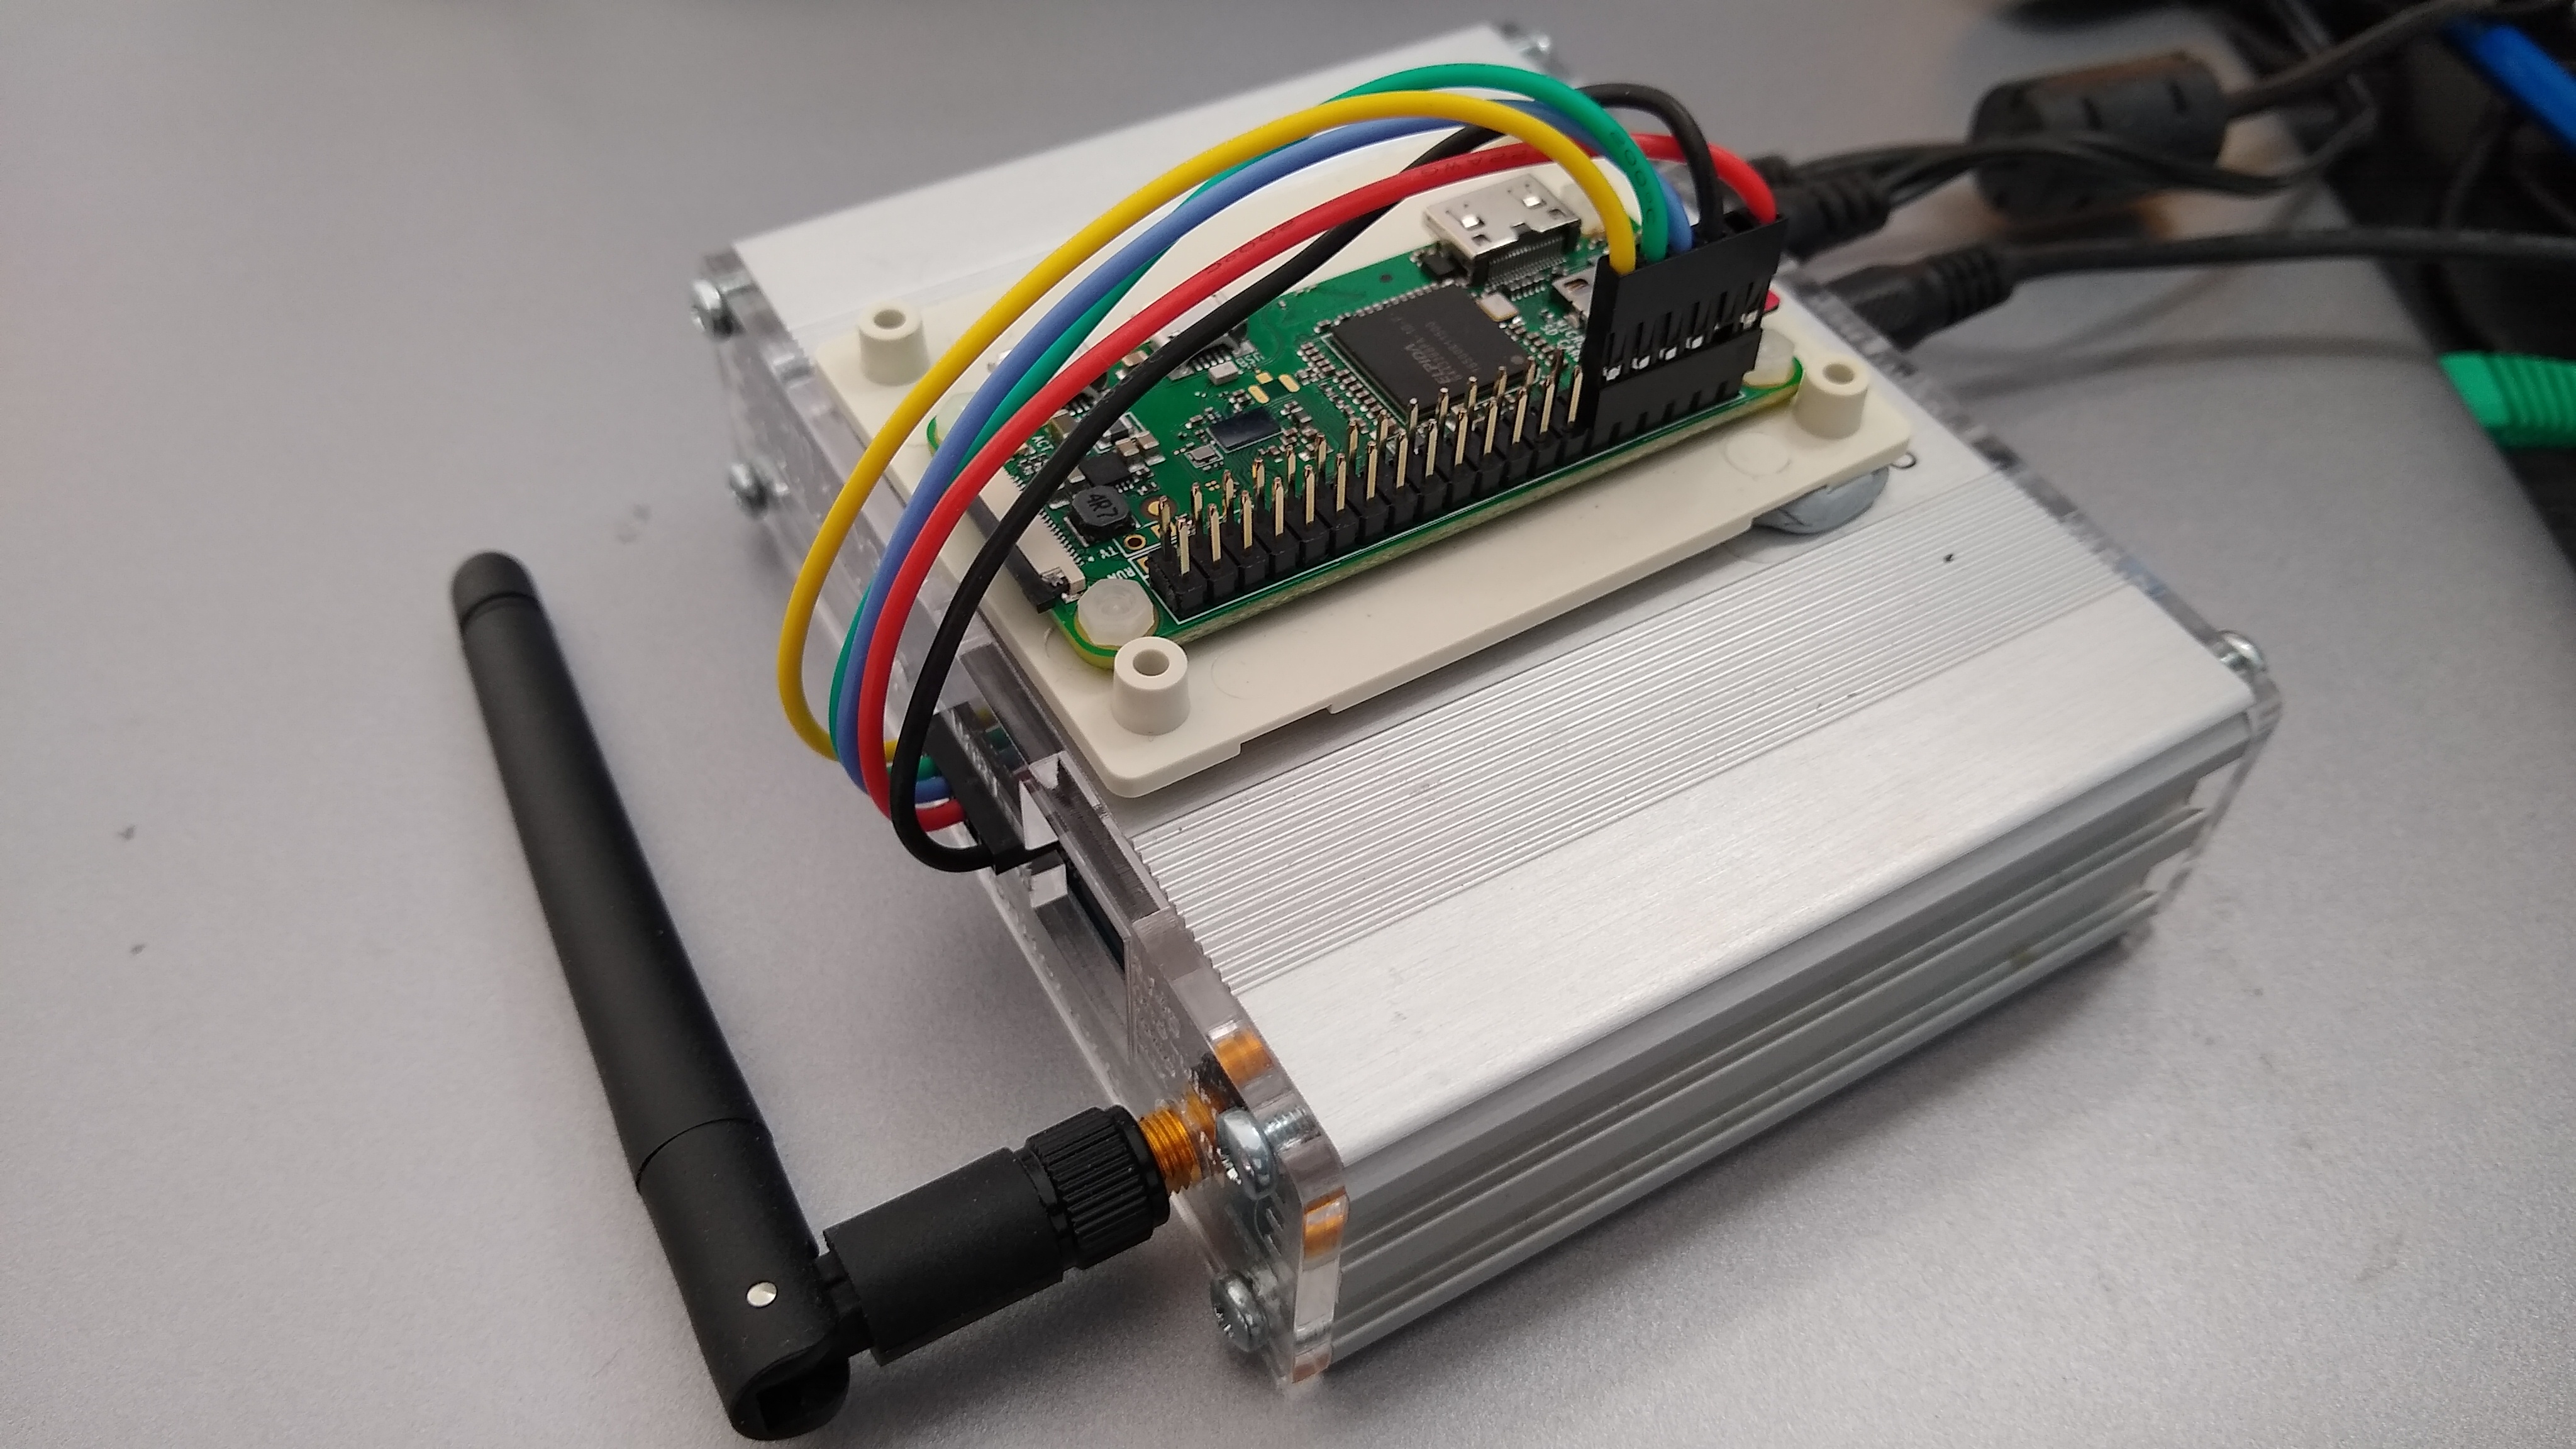
By way of an update, I bought some dupont connectors, a crimping tool and made up a cable. I had the case lying around and the Pi already had the header soldered on.

Currently running a full emonScript install.

The improvement would be to use right-angle headers and this case - it would be really neat then!

Link to wiring diagram

1 Like

@pb66, I’ve now got the Pi setup, I have installed pio and been able to build the hex, all I need now is to upload it.

Could you help to make sure I don’t make a complete horlicks of it please?

With it wired like this, Can I use minicom to monitor the output (presumably with emonhub stopped)?

[edit]
Should the reset button still work when connected like this?

1 Like

Yes you can, although I (and PIO) prefer to use miniterm, it used to be included in all but the most recent versions of the python(3)-serial package.

This will work ok for when the sketch is running, obviously there should be command line output whilst uploading without need for any serial term, in fact you must ensure that nothing is using the serial port when trying to upload.

TBH it will either successfully upload or it won’t, there are no easy ways to mess it up, assuming the correct sketch is compiled of course.

The gist of it is to use the rfm2pi wiki for rough guidance and a command line string template, changing the port address, hex location and maybe the upload baud too (unrelated to the usual baud set in the sketch) offhand I cannot recall the correct upload baud without confirming.

If you have difficulties post the issue and I’l try to help out, but without running through a similar upload to remind myself, I’m not sure what other advice to offer.

Ha! famous last words!!

I just recalled that the emonTx breakout pins are (were?) labelled the wrong way round, but you should be already aware of that if you have been getting serial output ok. Easy one to get caught out by if not paying attention and IO can get damaged if both ends are trying to write via the same pin. You should connect Tx to Tx and Rx to Rx (when using an emonTx), some may say this is “easier” but it is actually the opposite to standard practice as you may know.

1 Like

I think that’s still correct on the silk screen. As you say, the pin labelled Tx is looking for the data that is coming out of a pin also labelled Tx, etc.
BUT: possibly to confuse it even further, the emonTx V3.4.1 schematic is like this:
image
Make sense of that, if you can. (Actually, of the two involved, the pin nearest the end and furthest from GND is the one on which the emonTx is transmitting.)

And continues to cause endless confusion because of that.

When you look up the standard (or Wikipedia), how the emonTx is labelled would be correct if the emonTx were a DCE - Data Communications Equipment (a modem), which I would argue it most definitely is not.

1 Like

I’m not sure I’m following you, PB. What specifically is it that can get damaged?

That is installed.

In this case, emonhub? so just stop the daemon?

I’m not confident I am finding the right information - what I have found seems to be geared to the RFM chip rather than the emonTX.

Can I just do the upload from PIO, rather than the avrdude-rpi mechanism? Can I simply do a pio run -t upload and specify the serial port? I suspect I can’t as I need to control the reset line (but that is a guess).

This really is a dark science to me :cry:.

Yes I’m getting serial data from the TX, so I’m thinking that bit is OK.

I think he’s saying that if two outputs are connected together, one sourcing and one sinking, then excess current can flow. (He said, carefully avoiding the use of “Tx”. :innocent:)

Another minor success along my path of discovery - pressing the reset pin; causing a reset (funnily enough).

$ miniterm /dev/ttyAMA0 115200
--- Miniterm on /dev/ttyAMA0  115200,8,N,1 ---
--- Quit: Ctrl+] | Menu: Ctrl+T | Help: Ctrl+T followed by Ctrl+H ---
MSG:15,Vrms:245.22,P1:116,E1:4,pulse:1
emonTx V3 EmonLibCM Continuous Monitoring V1.50
OpenEnergyMonitor.org
No EEPROM setting found...using default values
Calibration:
vCal = 268.97
i1Cal = 90.90
i1Lead = 4.20
i2Cal = 90.90
i2Lead = 4.20
i3Cal = 90.90
i3Lead = 4.20
i4Cal = 16.67
i4Lead = 1.00
RFM69CW Node: 15 Freq: 433MHz Group: 210

RFM int...
'+++' then [Enter] now to enter config mode...5s
CT1 detected, i1Cal:90.90
AC present
MSG:1,Vrms:244.74,P1:116,E1:0,pulse:1
MSG:2,Vrms:244.70,P1:117,E1:0,pulse:1
MSG:3,Vrms:245.14,P1:116,E1:0,pulse:1

Took my life in my hands and Success!! :grinning:.

Having installed the system using the emonScripts, some of the elements were already in place.

First compile the sketch. I know that @Robert.Wall is not keen on PlatformIO, but on the Pi it installed and worked flawlessly as described here GitHub - openenergymonitor/EmonTxV3CM: EmonTxV3 Continuous Monitoring Firmware (Default shipped EmonTxV3 firmware). The only oddity is creating the hex file. That instruction says use the upload option but that of course complains (although is does create the hex). A bit of digging and I created a new environment in the platformio.ini and an extra_script.py. This then creates the hex cleanly. The avrdude-rpi repo is created and installed by the emonScripts on the Pi so that was all ready to use (bar editing it to change the pin number for reset). Stopped the emonhub service first then ran the avrdude command as listed in the docs above and hey presto.

It has taken me quite a while, pulling the various bits of documentation together have taken time, but pretty pleased I got there in the end.

PlatformIO environment for the ini file (just adds the extra_scripts line).

[env:emontx_pi]
platform = atmelavr
framework = arduino
board = uno
build_flags = ${common.build_flags}
lib_deps = ${common.lib_deps_external}
monitor_speed = ${common.monitor_speed}
extra_scripts = post:extra_script.py

The extra_script.py file

Import("env", "projenv")
from shutil import copyfile

def save_hex(*args, **kwargs):
    print("Copying hex output to project directory...")
    target = str(kwargs['target'][0])
    copyfile(target, 'output.hex')
    print("Done.")

env.AddPostAction("$BUILD_DIR/${PROGNAME}.hex", save_hex)   #post action for the target hex

to build (first run pulls in the Libraries)

pio run -v -e emontx_pi

You need to edit the file /opt/openenergymonitor/avrdude-rpi/autoreset and change the pin number to 12.

to upload (having stopped emonhub)

avrdude -v -c arduino -p ATMEGA328P -P /dev/ttyAMA0 -b 115200 -U flash:w:firmware.hex

[edit]
The extra script is now available in the repository as is a new platformio.ini file so the compile command should just work. (14/8/20)

Just for posterity and so if anyone find this by search…

To get ‘miniterm’ to accept input from the keyboard (so enter config mode) you need to add the --rtscts option.

$ miniterm --rtscts /dev/ttyAMA0 115200

Secondly, the NodeID is by default 0. If you want to change this you need to add the nodeoffset option such that

[[SerialTx]]
     Type = EmonHubTx3eInterfacer
      [[[init_settings]]]
           com_port= /dev/ttyAMA0
           com_baud = 115200
      [[[runtimesettings]]]
           pubchannels = ToEmonCMS,

           nodeoffset = 1

Note the comma after the pubchannels line and the blank line.

As the data comes in as name:value pair, there is no need for a node definition to decode the data, so choose an unused number (0-4) or delete the node definition.

[edit]
It is also good practice to remove the JP2 when powering from both AC and DC.

https://community.openenergymonitor.org/t/emontxv3-stops-and-requires-reboot-emonhub/5448/50

https://guide.openenergymonitor.org/technical/emontx/#configuration

The final question (I hope), looking at the inputs;
image

What is the correct processing to log to feed? Is the cumulative Energy more accurate than using the power?

If you’re talking about emonLibCM - possibly, but you’d probably need to carefully contrive the numbers to show it. Power is reported as watts, rounded to an integer; energy is reported as cumulative watt-hours truncated to an integer, but the truncation error is carried forward into the next reporting period.

Having said that, it probably only matters if you’ve calibrated your emonTx, because component tolerance errors (at around 1%) are likely to be larger than these in normal circumstances.

[Edit - 5 days later]

It turns out that I was not far wrong there. Having carefully logged both Energy accumulated by emonLibCM and Wh accumulated by emonCMS from power, for two channels with c.t’s on the same cable, the ratios of Energy/Wh over a count of 4000 approx. are

Ch 1: 1.0015
Ch 2: 0.9992
The emonCMS logging interval is 5 s, emonLibCM’s reporting interval is 4.98 s, a ratio of 1.004
(1 Wh in 4000 is 1.00025)

The calibration against meter pulses is +1.15% for Ch.1 and +0.29% for Ch.2.

1 Like

There is always something else isn’t there…

I discovered that, somehow, I did not have the latest version of the firmware. I was sure I’d cloned the repo recently, so why I was on version 1.3.0 I have no idea.

Updated the repo and rebuilt the hex. Uploaded to the emonTX. By default the serial output is disabled now so I needed to switch the RF off (w0) in config mode.

Other than that all seems good.