I’ve tried to understand how to be able to create dashboards here on my Windows 10 PC, and gather I need to load a module. I have no idea how to do this. Discussions I have found seem to get bogged down in distracting side issues, and I am just looking for a simple set of instructions.
Which emonCMS are you using - is it emoncms.org, emonCMS running on an EmonPi, or have you set up emonCMS on your Windows 10 PC?
I’m afraid the versatility of emonCMS makes that almost impossible, but it’s not hard once you get into it. If you have a reasonably up-to-date emonCMS, you shouldn’t need anything extra, but I’ll wait to see which emonCMS you are using. Where have you looked for guidance, and what information do you want to display on your dashboard?
I am using emoncms running on an emonpi, viewed on my PC.
I looked at the forum, but all the questions were complicated, and didn’t explain the basics.
2. Log Locally - Guide | OpenEnergyMonitor has a link to " Setup > Dashboards" but i get a 404.
I have viewed the video explaining how to create dashboards, which seems pretty accessible, I just need to get the right module (I think) to have the facility to do this.
However, checking, I see that I apparently have:
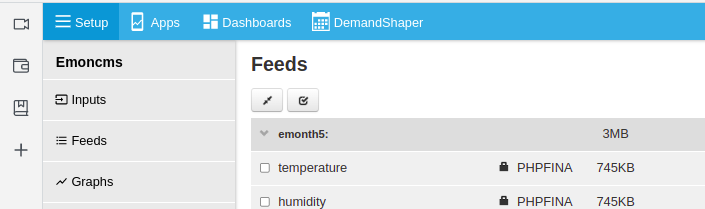
“Emoncms
Version
low-write 10.1.0
Modules
Administration | App v2.0.1 | Backup v2.1.0 | EmonHub Config v2.0.2 | Dashboard v2.0.2 | Device v2.0.0 | EventProcesses | Feed | Graph v2.0.1 | Input | Postprocess v2.1.0 | CoreProcess | Schedule | Network Setup v1.0.0 | sync | Time | User | Visualisation | WiFi v2.0.0”
So, if the module is there, which menu item will offer it to me?
Chris
If you log in to your emonCMS (using a web browser on your WIndows machine) you should see across the top a blue banner:
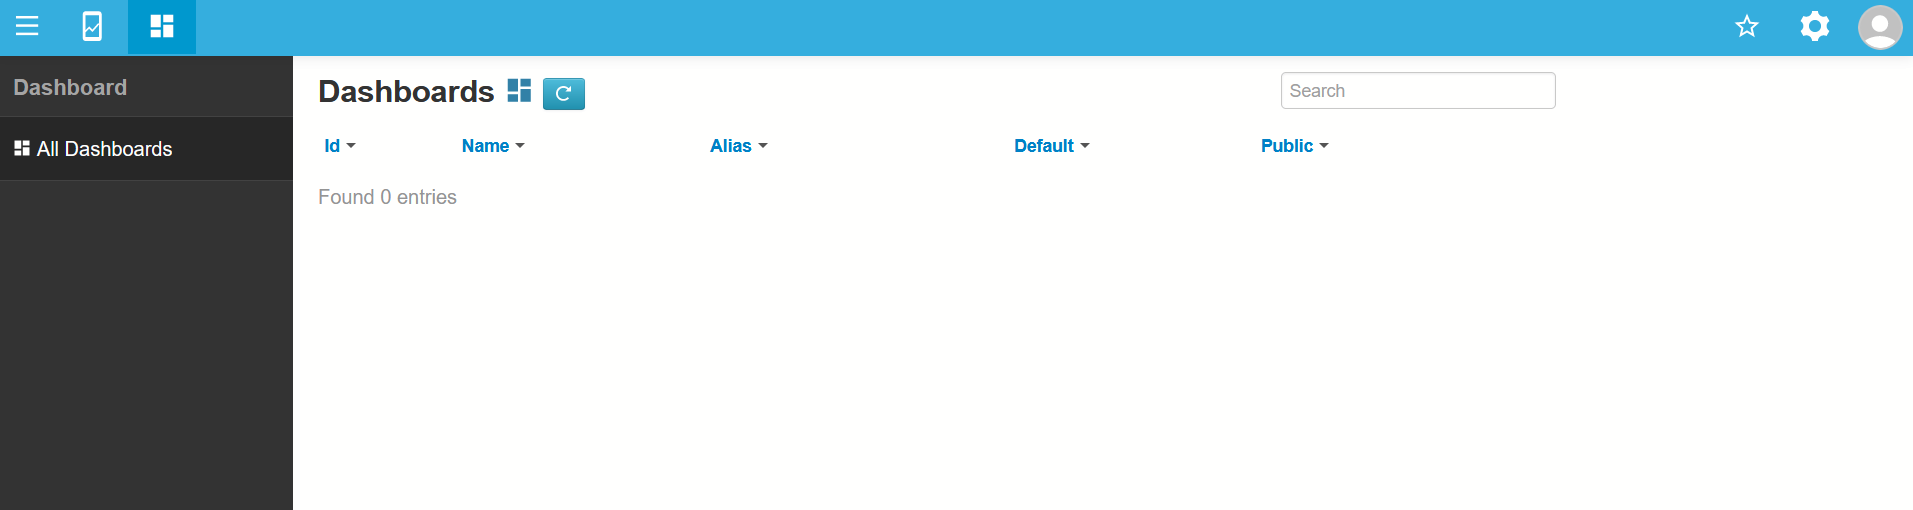
Click Dashboards → All Dashboards:
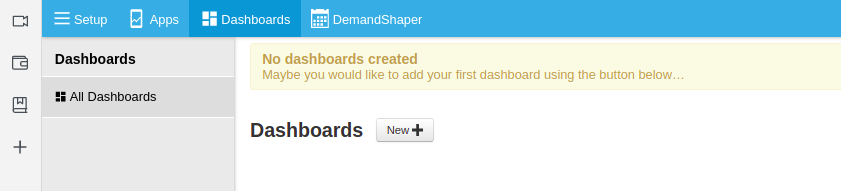
Click New+
Hover your mouse over the various boxes and buttons to see what they do, then click on the ‘gear’ icon and edit (actually create) a layout.
Here, I’ve shrunk my browser window:
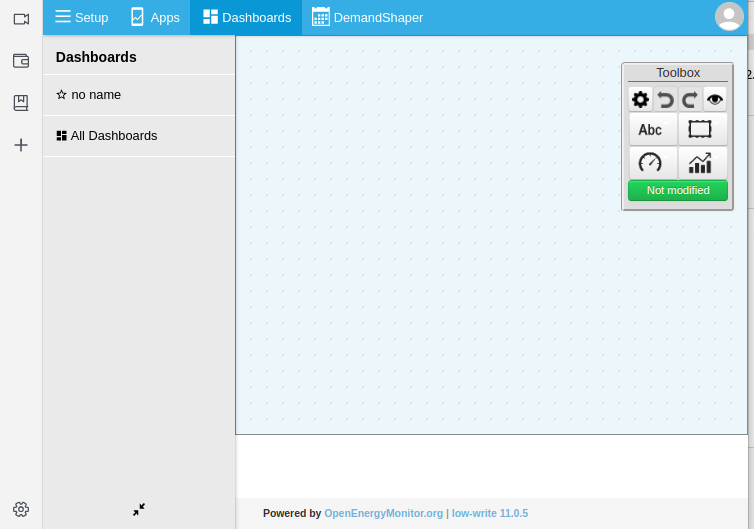
Again hover your mouse to see what each button in the Toolbox does.
Let’s add a dial: Click on the dial (“Widgets”) and then choose and click on Dial. Move your mouse pointer to where you want the dial and click again - it should appear. Note the 5 boxes - one in the middle and one on each edge. The edge ones change the size, the centre one moves it intact.
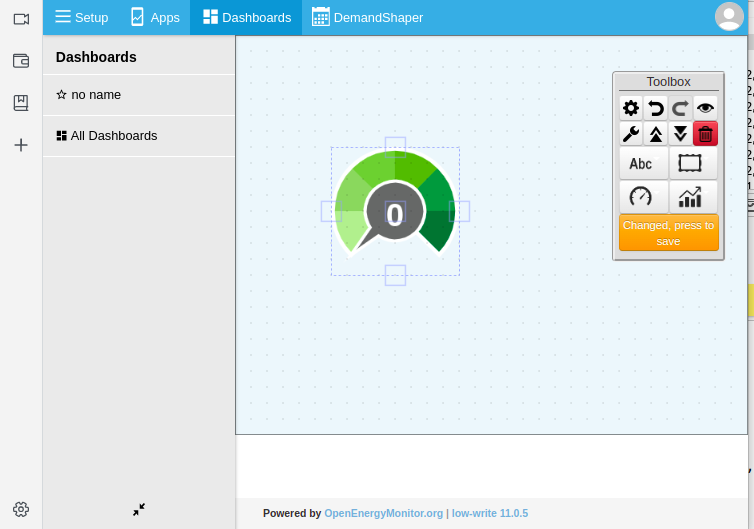
Click the spanner to configure the dial. Fill in the boxes with something sensible.
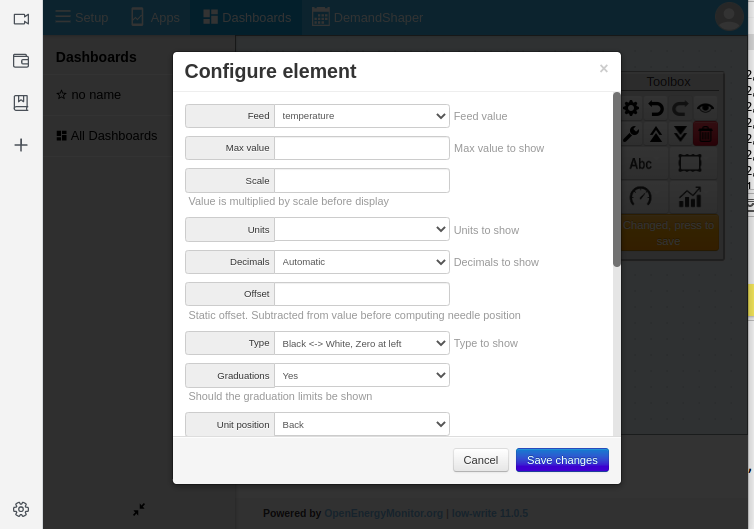
Use the drop-down list ‘Feed’ to choose the feed that will operate the dial, Max value, Scale and Offset are best played with to understand exactly what they do, Units and Decimals are obvious. Type is the colours and general appearance.
You might end up with something like this - you can always come back and change it. Click “Changed, press to save” before you forget.
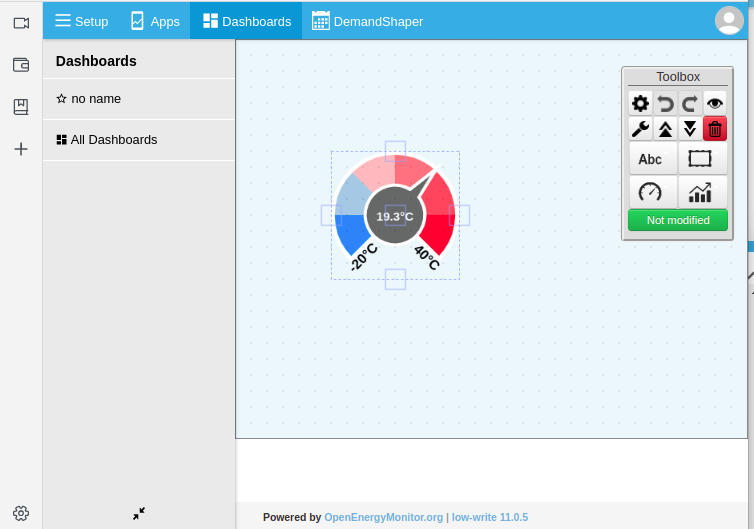
Click the Eye and it should spring to life displaying real-time values. Is that enough to get you going?
Hopefully a silly question: Have you done a [Ctrl]-[F5] to refresh your browser cache? If you have and that doesn’t fix it, you’ve all but reached the limit of my knowledge of the emonCMS internal workings, and we’ll need somebody else to help.
The suggestion might be to update to the latest version, because we can’t continue to support old versions for ever, and the sooner you update, the easier and less liable to problems it tends to be.
Cache is not an issue. I tried update, but looks like I have a new bit of learning waiting for me:
Starting update via service-runner-update.sh (v2.0) >
- emonSD version: emonSD-30Oct18
ERROR: emonSD base image old or undefined…update will not continue
See latest verson: emonSD pre built SD card Download & Change Log · openenergymonitor/emonpi Wiki · GitHub
By the way, nobody commented on the issue I mentioned
2. Log Locally - Guide | OpenEnergyMonitor has a link to " Setup > Dashboards" but I get a 404.
I’ll flag the broken link.
Repeating myself, I’m not an emonCMS expert, so unless somebody who is steps in, I believe the route will be to download the latest emoncms image, backup your old data and then restore it to the new image. I’ve never needed to do this, so I don’t know what’s involved.
Thanks.
I have ordered the latest Pre-loaded SD card, so will then be able to get everything up to date.
I’ve now had a play with the backup and restore.
It’s fairly obvious, it creates a compressed (.tar.gz) file on the emonPi which you can then download onto your Windows machine via the web browser. When you’ve inserted your new SD card (or flashed your old SD card with the new image), and started the emonPi and let it update itself, you can then go to backup again and restore the data from your Windows machine, again using the web browser. One “gotcha” that might alarm you: it can switch to the “Import USB” tab (from “Import archive”) when you refresh as instructed and show a blank progress log, making you think nothing is happening, when in fact it’s progressing on the other tab.