Hi, I am trying to upload latest.hex to arduino through Raspi. I have designed a custom build variant of EmonPi. I am using your pre built image for emonpi.
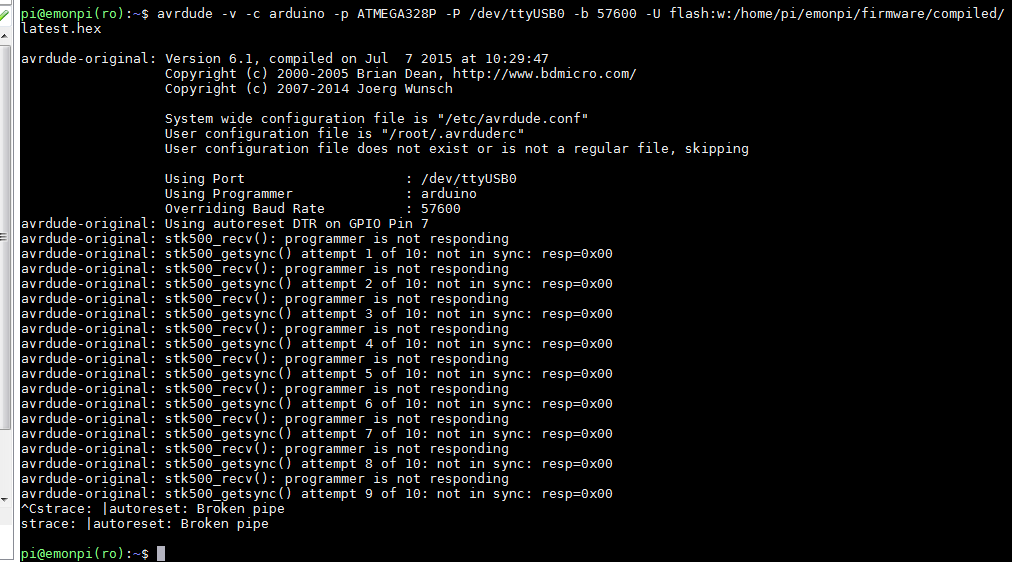
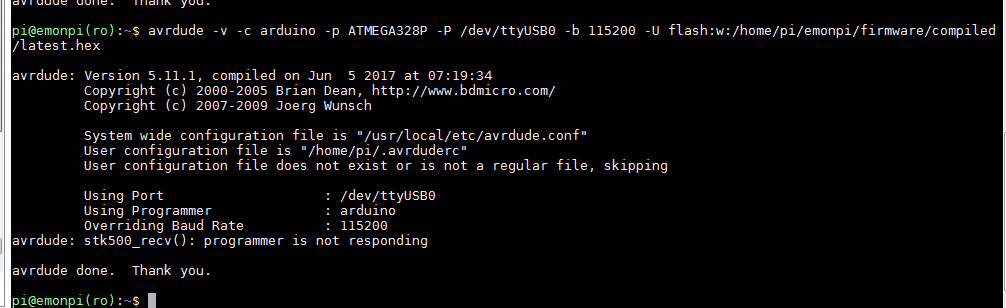
Thanks, with this information I have installed old version of avrdude and this some how works! However, the programmer is not responding as shown in the image. I want to know how to set the configuration file which shows settings for atmega328p as for example:
programmer
id = “gpio”;
desc = “GPIO lines”;
type = gpio;
reset = 8;
sck = 11;
mosi = 10;
miso = 9;
(These are example pins)
But according to schematic SDA and SCL are being used to connect with Raspi and in this section mosi and miso pins are used. Maybe thats why .hex file is not uploading. My target is to get the voltage from CT sensor when I connect it to AC device as emonPi works. I am new to this. Kindly guide and rectify me.
The reason the old version works is because you have installed it over the avrdude-rpi mods effectively undoing them and putting it back to standard, reinstalling the same version (v6.1) would have had the same effect.
You will need to tell us more about your “custom build variant of EmonPi”, how similar to an emonPi is it? what are the differences? the information you have provides is not clear. Originally you were talking about a Nano based device connected via USB and now you are asking about SPI and bring I²C into the mix too.
On a genuine emonPi the I²C is used for the ATmega328p to control the LCD during boot up before the RPi takes over once fully booted. The SPI is not used on the RPi and the ATmega328p uses it’s own SPI lines to communicate with the rfm69cw module, although there is also a (footprint or) header for in-circuit programming using a parallel programmer.
All the emon devices are programmed via a serial connection, in the case of the emonPi and RFM2Pi’s it’s done via the RPi GPIO serial UART’s Rx and Tx pin’s, the reset control is provided by avrdude-rpi via another GPIO pin (7). The emonTx and emonTh etc are programmed via a USB to serial programmer connected to the 6way header. But in either case the Rx, Tx and Rst pins on the ATmega328p are used for sketch uploads.
Have you installed a bootloader? This is essential to provide the ability to upload via serial as a “clean” ATmega328p can only be initially programmed via the SPI, once the correct bootloader is in place you can upload via the serial pins.
Have you tried installing a sketch from a desktop PC using the Arduino IDE?
I had this issue last night when trying to upload a new sketch, the solution for me was to unplug/plugin the FTDI cable from the programming header and issue the command.
Very odd indeed.
I followed the schematic step by step, I have interfaced an arduino nano with raspberry pi 3 with a shutdown switch and a CT sensor. I used emon pi sd card image provided.
I havent used RFM69CW & RFM2Pi.
I want to know how I can program arduino Nano to receive the values from CT sensor? Which program need to be uploaded to get the values from CT sensor? I have connected Nano from its B type usb connector to Raspi usb, GNDs are common.
How to code Atmega328p with Raspi to receive the values on Emoncms. Which program is working for RFM69CW & RFM2Pi modules? My LCD is interfaced using I2C and LCD showing EmonPi version, ethernet settings efficiently.
I am using avrdude to upload latest.hex file in arduino, basically which program is the heart and soul of the atmega chip? Kindly tell me the baudrate for Nano to be used.
The standard “latest.hex” files will be of no use to you. Firstly they are not compiled for a Nano, secondly if you do not have an rfm69cw the setup() will not complete, as there will be no response from the module.
There are a number of sketches that you can alter for your purpose, you can remove the rfm69 stuff from the emonPi or any of the emonTX sketches, for example.
However you need to forget about bespoke sketches, reading current and your final setup for the moment and go back to trying to load something very basic like the Arduino example blink sketch. Doing this will test the chip, the power, the reset, the serial connection and that you are using the right configuration.
Once you can load and run the blink sketch from a PC using the Arduino IDE you can then (without changing any configuration or connections) try to upload an OEM sketch, it it fails to compile or upload post the output here for us to look at.
Once you can successfully upload OEM sketches from the PC + IDE we can try to install something from the Pi, e.g. a compliled hex of the blink sketch or a proven ok OEM sketch.
As it stands at the moment it could be a problem with the Nano, the bootloader, the sketch, the settings, the serial port, the Pi’s dev env etc etc and there is no way to differentiate between all the potential issues without going back a few steps and advancing one step at a time…