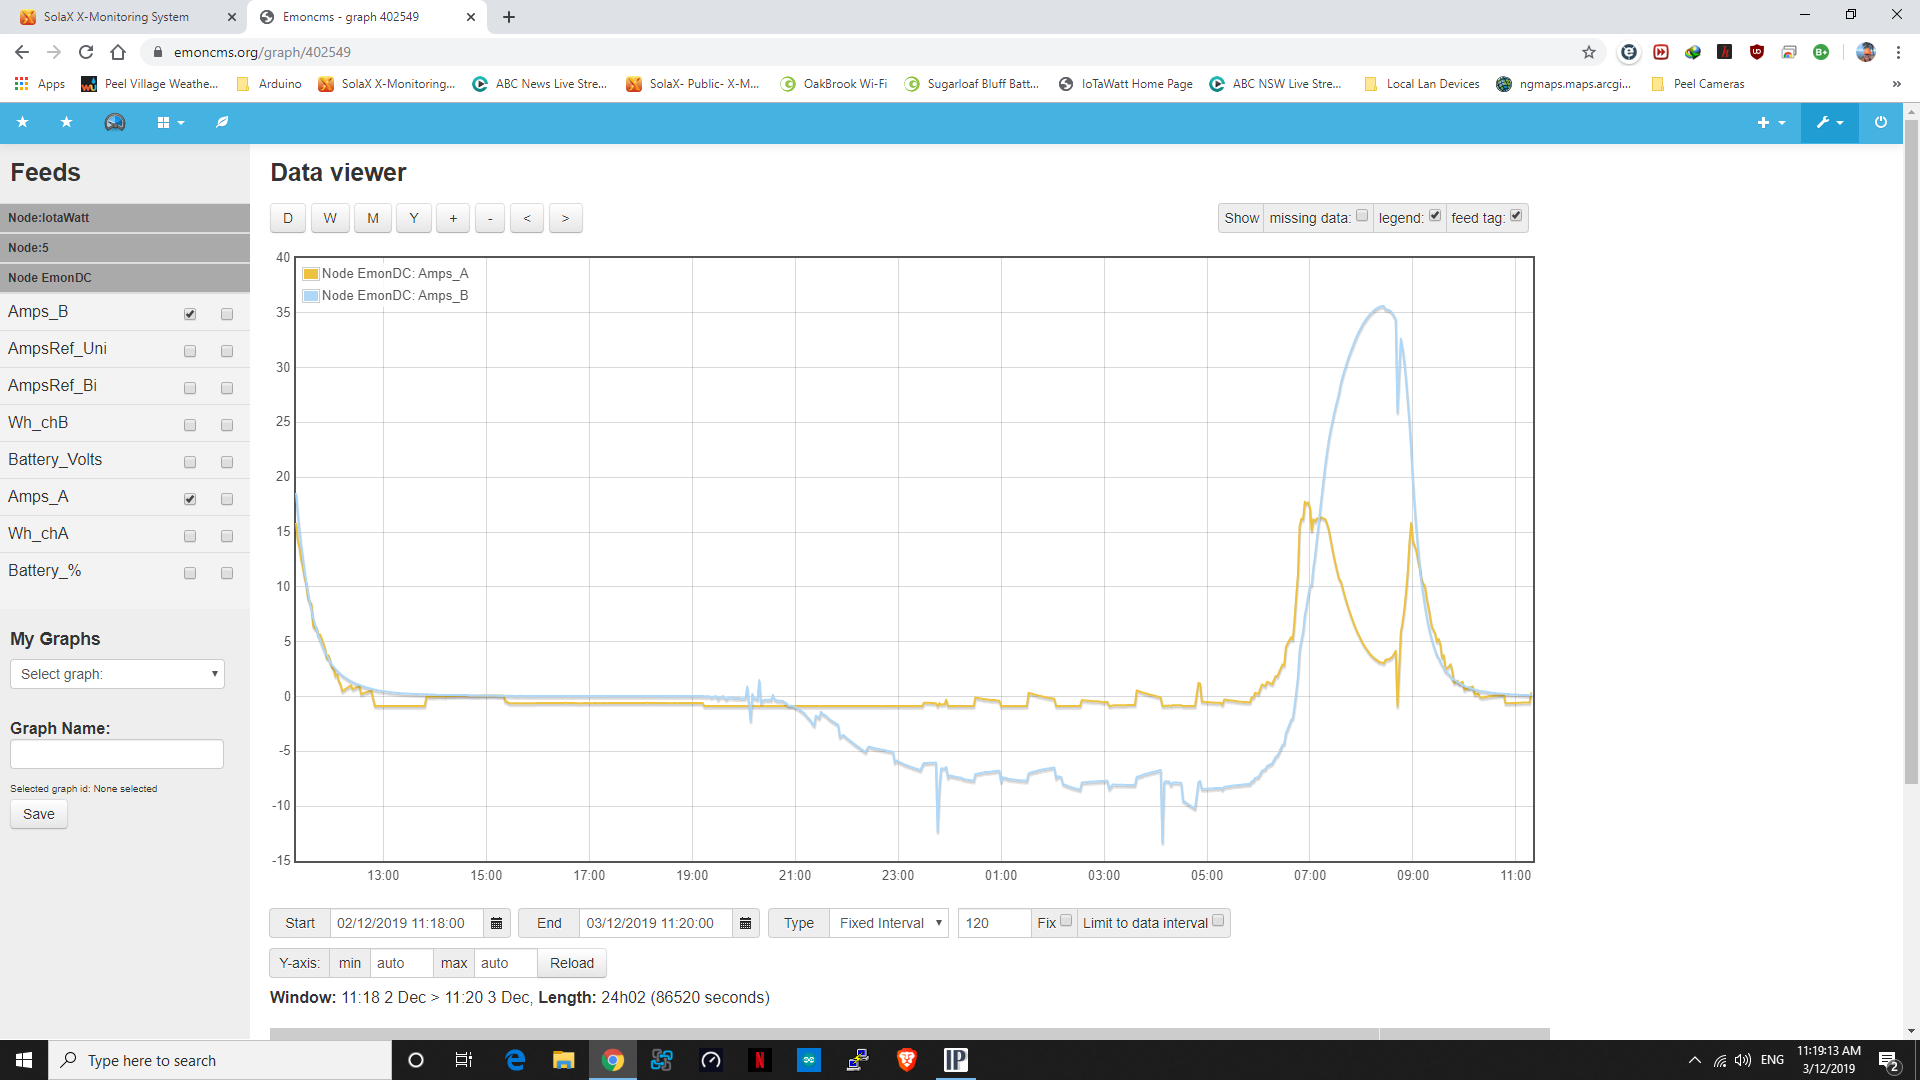
I have just been learning how to log data into emoncms.org and able to check the data, but finding that channel B does bi-directional logging, but channel A seems to only do uni-directional logging out of the box, just wondering if or how i can enable bi-directional on both channels?, as i have a duel battery bank feeding my solar with different lithium chemistry, with one bank on A channel and the other on B channel
Hi Ross,
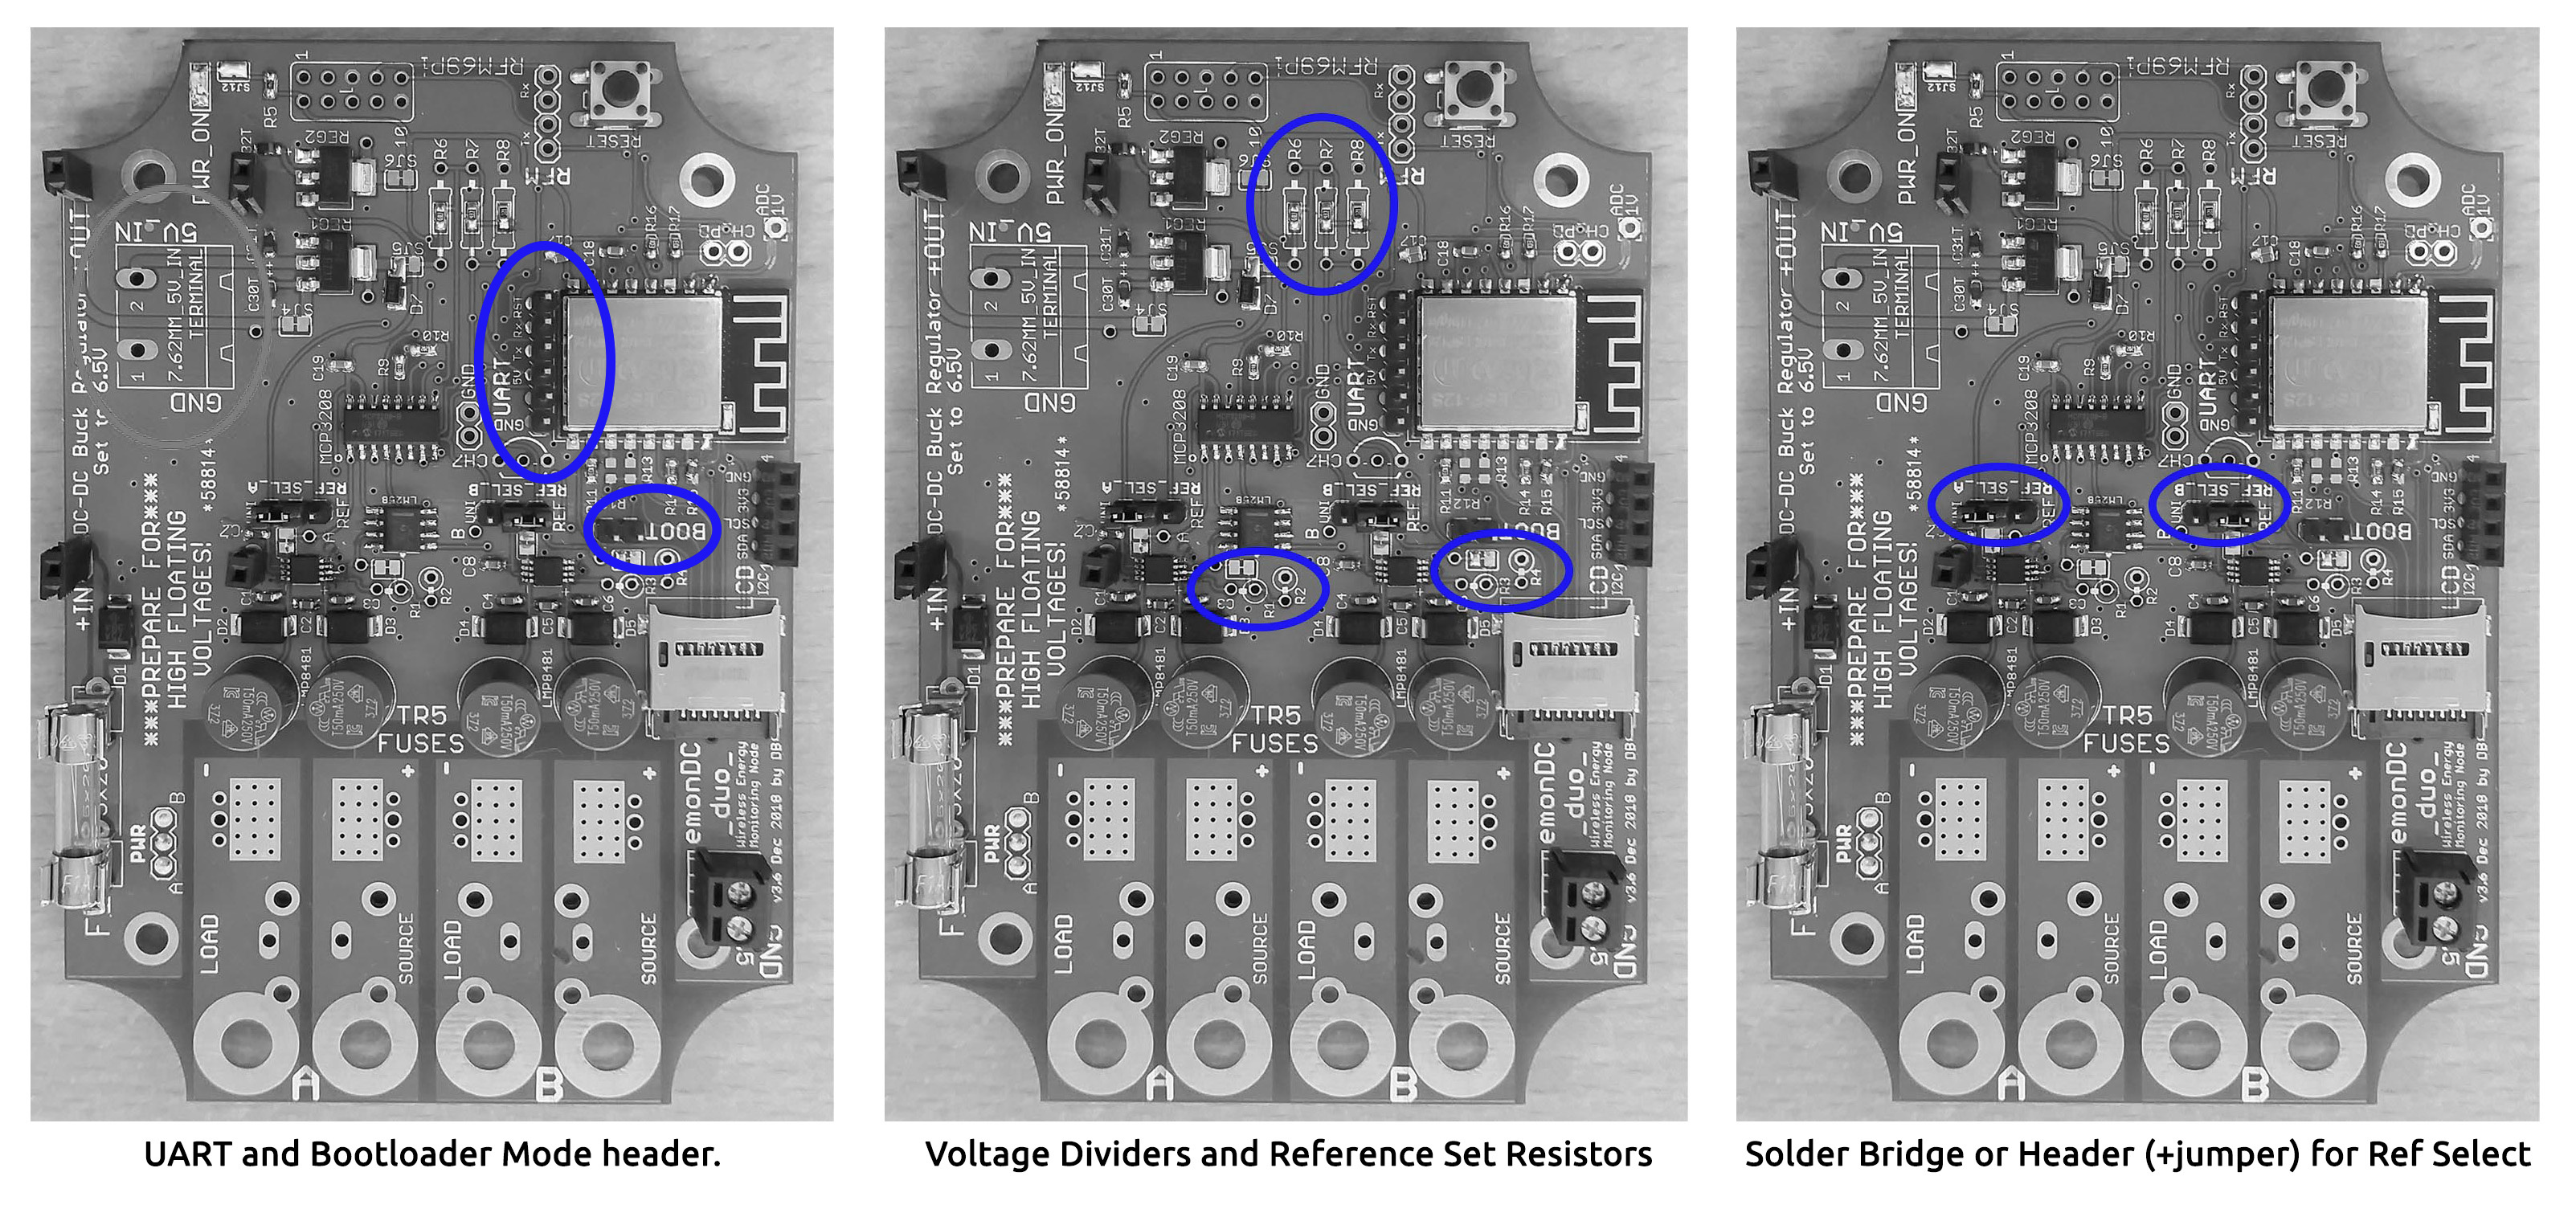
Glad to see you’ve got it up and running. The channel setting as uni or bi-directional takes two changes. First, a jumper needs switching, third image along shows the RefSelects:
Second is a firmware reflash. Bit fiddly I must say but if you’d like to give it a go lines 10 and 11 in emondc.ccp are the relevant lines.
. https://github.com/danbates2/emonDC/blob/master/projects/emonDCduo/firmware/emonESP_SEP2019/src/emondc.cpp#L10
I’ve tried a couple of times to make the firmware change to have emondc settings done from the interface.
Yes i can see the different default for each channel.
bool chanAref = 0; // Channel reference select: 0 for unidirectional, 1 for bidirectional.
bool chanBref = 1; // Channel reference select: 0 for unidirectional, 1 for bidirectional.
Yes i will have to learn how to change so both channels will have to be set to 1
Looking at channel B jumper, will I only need to more the jumper on channel A to be like it is on channel B, so both are as B channel?
I might be looking at 3 more of these EmonDC units for a solar wifi links, what i see so far is it’s ability to log data to emoncms, at the moment I am using a Tycon TPDIN-Monitor-WEB2 and only able to log locally and not global and has limited amount of logging capacity.
I am a little weak on the programming thing, have played around with The Arduino Software (IDE) using its USB interface and also with the EnomTX, as i will be away from home until next Tuesday, will be looking at trying a few things with a bit of help.
Ross
Okay, thanks for the info. It’s the same upload method with emonDC as emonTx.
Arduino IDE and an FTDI/UART adaptor can be used.
Although, ArduinoIDE needs setting up to compile for the ESP module.
-
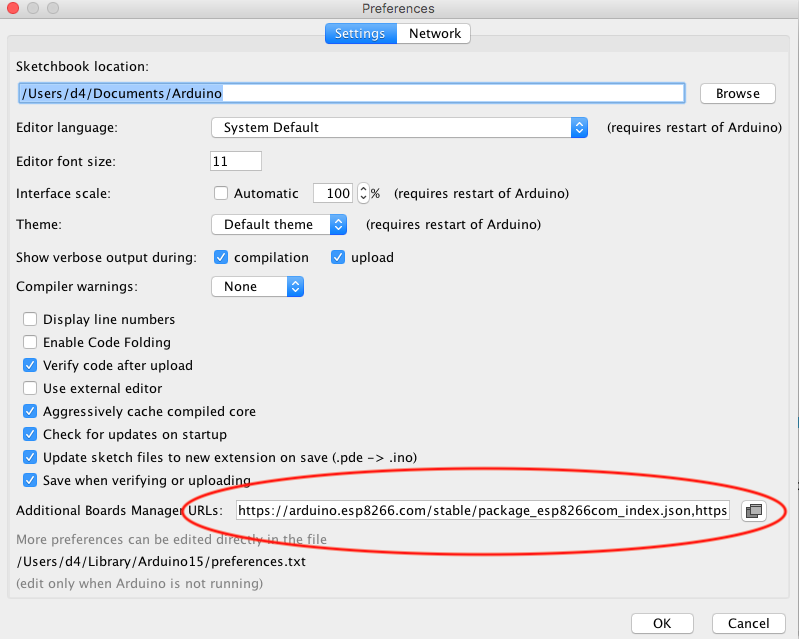
Open Arduino preferences and add the line https://adafruit.github.io/arduino-board-index/package_adafruit_index.json to the board manager URLs.
-
Go to Tools > Board: > Boards Manager. Search for esp8266 and install version 2.4.2.
-
Download firmware and load src.ino.
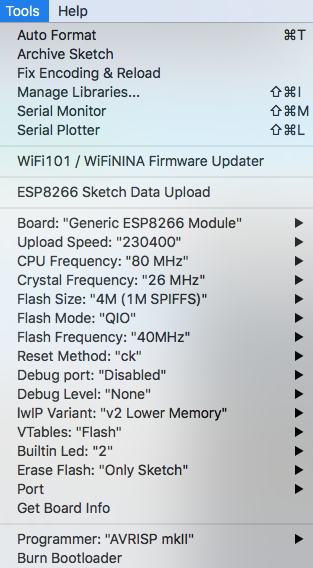
Copy these board settings:
- Board: Generic ESP8266 Module
- Flash Size: 4M(1M)
should be the only settings needing changing.
for reference:
I usually have to do a second stage flash for the webserver stuff. If the web-interface isn’t loading properly then we can do the 2nd stage…
Will get back to upgrade later next week when I return from Groote Eylandt mine shutdown job, I will keep you posted how I go