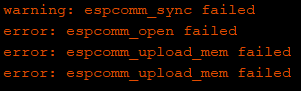
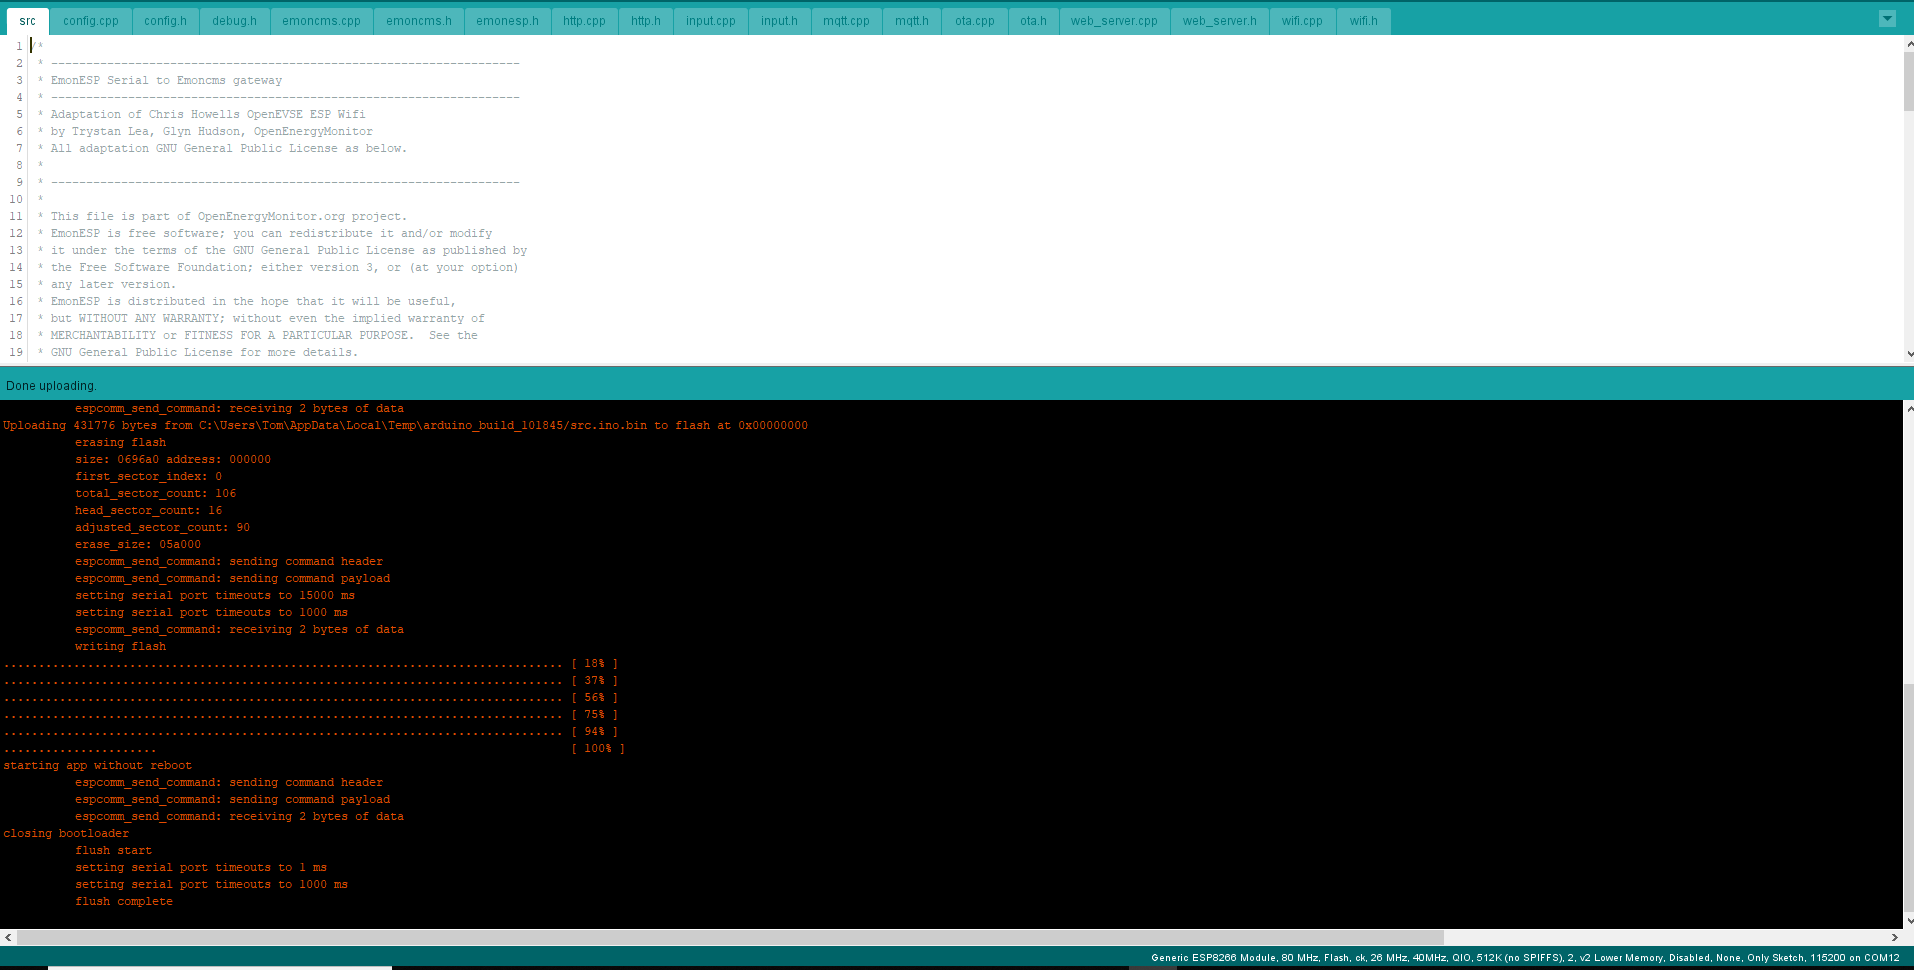
just trying upload frimware to the esp8266 having issues with espcomm
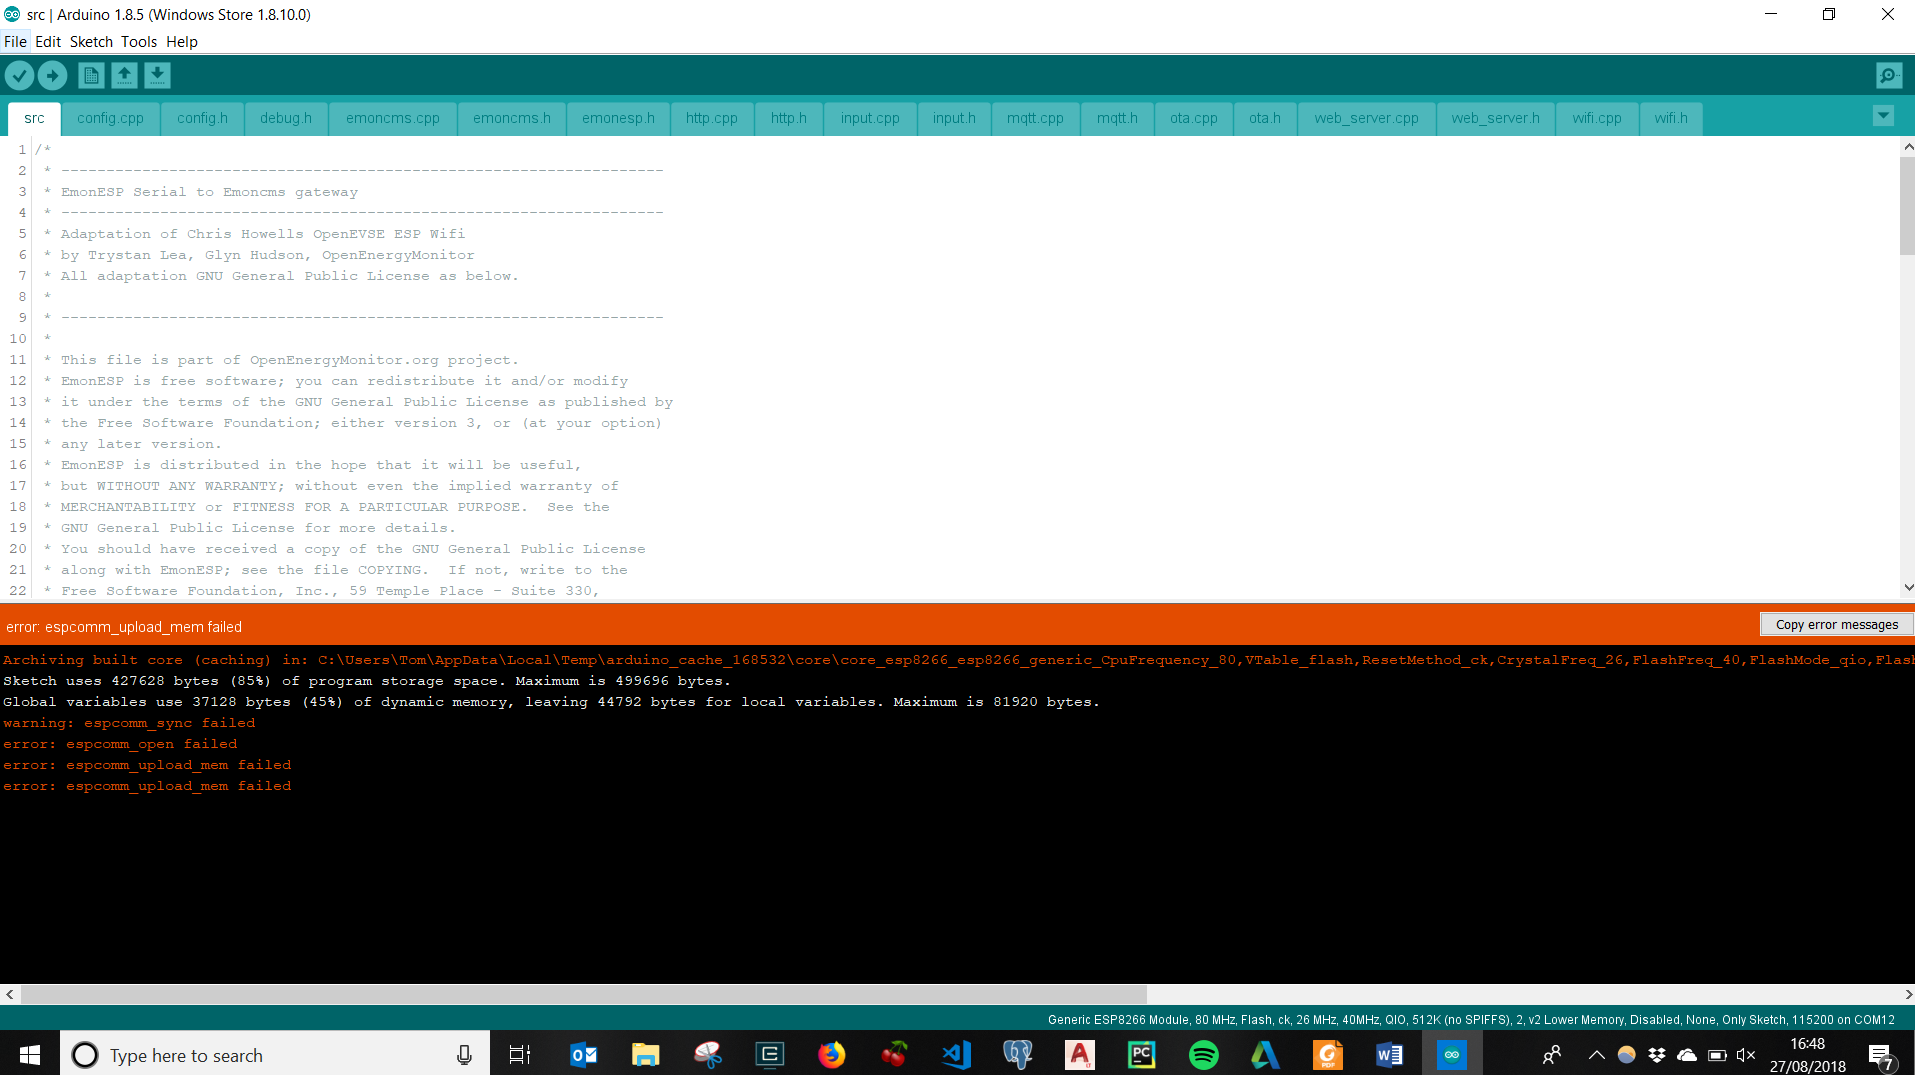
(Pic 1)
From looking round the forum I think it may be that I am not correctly putting it in to bootloader mode, have followed guide to best of my (limited) ability and gone through multiple iterations but had no luck.
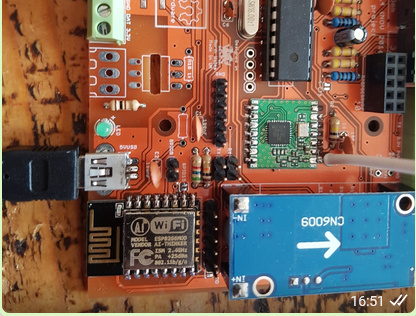
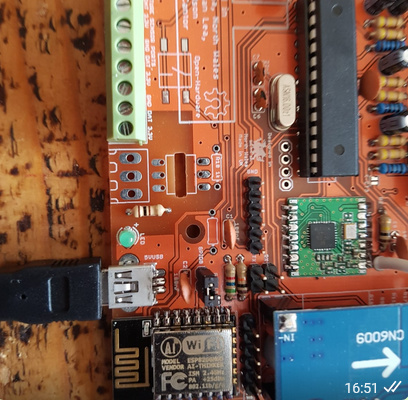
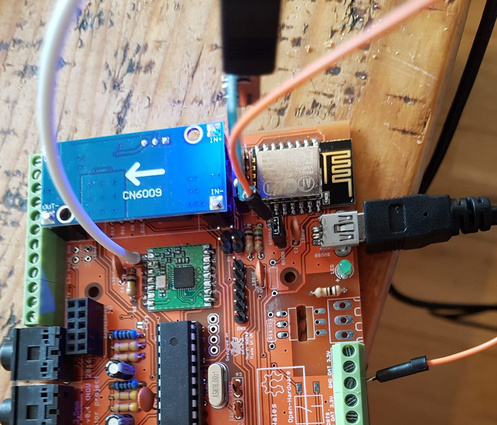
My interpretation of upload process is have power connected to board
apply jumper to GPIO0
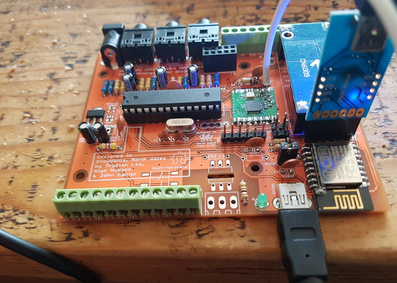
Removing 5v usb power and re apply, keeping the jumper connected. Then connecting into UART with ground been leftmost pin
I have tried variations on this theme, UART flipped etc. however no joy (whatever method I use I still get to see pic1) does the inbuilt LED have to be lit/ unlit/flashing to indicate that it is ready for bootloading ?
is there an obvious error in the above, any help would be greatly appreciated.
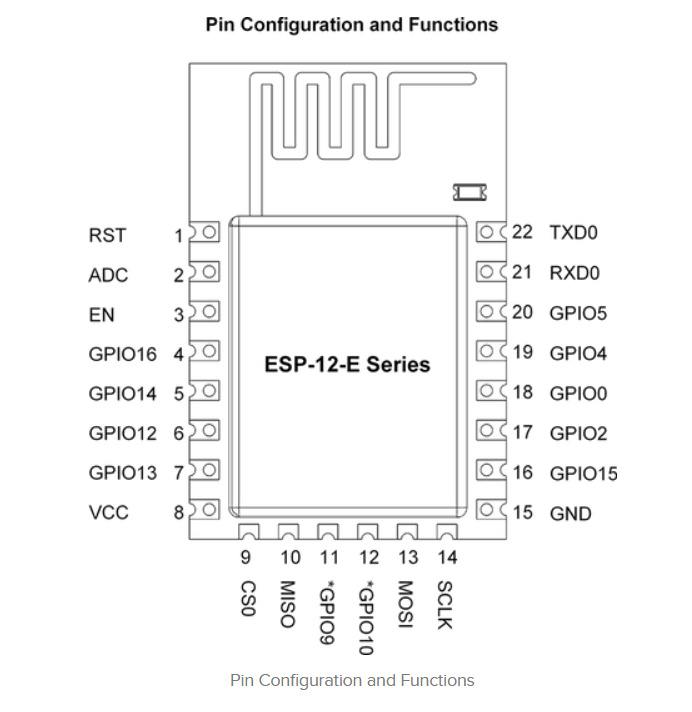
and along with this " to let ESP8266 enter bootloader, you need to solder a wire from ESP8266’s GPIO0 pin to ground. Specifically, if GPIO0 is pulled to ground, upon power-up ESP8266 will enter bootloader mode waiting for a new firmware from the Serial interface. In contrast, if GPIO0 is pulled up (to VCC), ESP8266 will boot into normal operation mode" from https://rayshobby.net/wordpress/esptoy/ I connected GPIO0 with GND on the board:
Still not managed to upload, same comms error. not sure what I am doing wrong ?
On Heatpump monitor use jumper to pull GPIO0 low then reset then connect power (simulates reset) or pull RST pin low.
On other ESP boards (Adafruit HUZZAH) press and hold GPIO0 button then press Reset, LED should light dimly to indicate bootloader mode
a.) Upload main program:
I must admit I have had trouble installing firmware on ESP boards.
I now tend to use Wemos boards and build them into my projects as they support seamless uploading with a standard usb connection both from platformio and Arduino.
Good effort getting this far, looks like you have the right procedure, apart from the ground link addition thats not needed. What are your settings in the Arduino IDE for the ESP8266? Did you select " Generic ESP8266 Module" ?
Build options changed, rebuilding all
Archiving built core (caching) in: C:\Users\Tom\AppData\Local\Temp\arduino_cache_168532\core\core_esp8266_esp8266_generic_CpuFrequency_80,VTable_flash,ResetMethod_ck,CrystalFreq_26,FlashFreq_40,FlashMode_qio,FlashSize_512K0,led_2,LwIPVariant_v2mss536,Debug_Disabled,DebugLevel_None____,FlashErase_none,UploadSpeed_115200_15c565d823ffa23d5c91a6b8733ae080.a
Sketch uses 427628 bytes (85%) of program storage space. Maximum is 499696 bytes.
Global variables use 37128 bytes (45%) of dynamic memory, leaving 44792 bytes for local variables. Maximum is 81920 bytes.
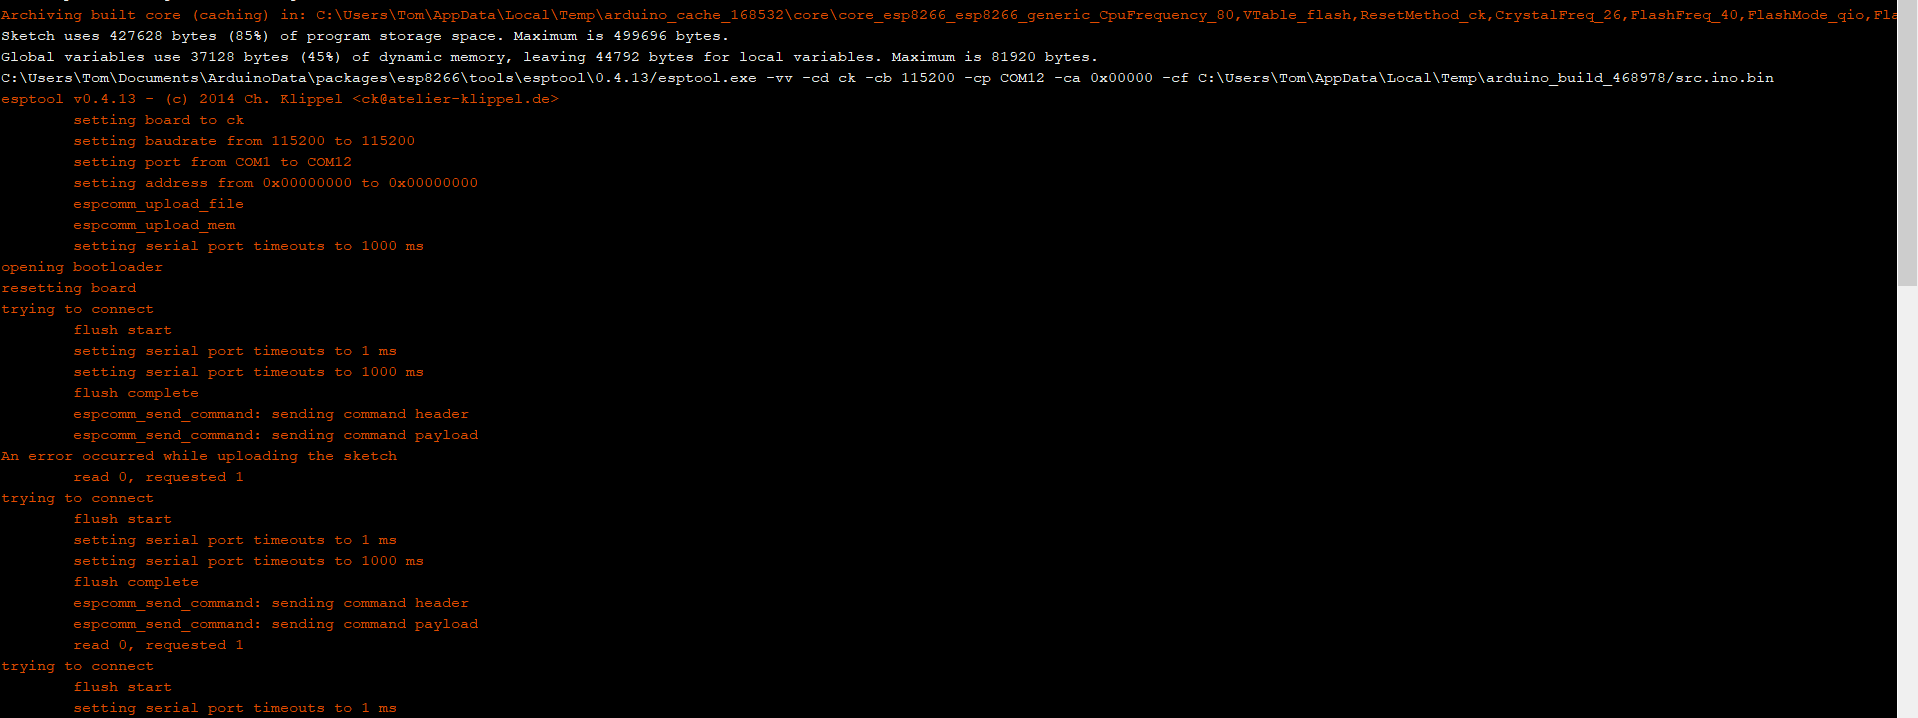
C:\Users\Tom\Documents\ArduinoData\packages\esp8266\tools\esptool\0.4.13/esptool.exe -vv -cd ck -cb 115200 -cp COM12 -ca 0x00000 -cf C:\Users\Tom\AppData\Local\Temp\arduino_build_468978/src.ino.bin
esptool v0.4.13 - (c) 2014 Ch. Klippel <[email protected]>
setting board to ck
setting baudrate from 115200 to 115200
setting port from COM1 to COM12
setting address from 0x00000000 to 0x00000000
espcomm_upload_file
espcomm_upload_mem
setting serial port timeouts to 1000 ms
opening bootloader
resetting board
trying to connect
flush start
setting serial port timeouts to 1 ms
setting serial port timeouts to 1000 ms
flush complete
espcomm_send_command: sending command header
espcomm_send_command: sending command payload
An error occurred while uploading the sketch
read 0, requested 1
trying to connect
flush start
setting serial port timeouts to 1 ms
setting serial port timeouts to 1000 ms
flush complete
espcomm_send_command: sending command header
espcomm_send_command: sending command payload
read 0, requested 1
trying to connect
flush start
setting serial port timeouts to 1 ms
setting serial port timeouts to 1000 ms
flush complete
espcomm_send_command: sending command header
espcomm_send_command: sending command payload
read 0, requested 1
resetting board
trying to connect
flush start
setting serial port timeouts to 1 ms
setting serial port timeouts to 1000 ms
flush complete
espcomm_send_command: sending command header
espcomm_send_command: sending command payload
read 0, requested 1
trying to connect
flush start
setting serial port timeouts to 1 ms
setting serial port timeouts to 1000 ms
flush complete
espcomm_send_command: sending command header
espcomm_send_command: sending command payload
read 0, requested 1
trying to connect
flush start
setting serial port timeouts to 1 ms
setting serial port timeouts to 1000 ms
flush complete
espcomm_send_command: sending command header
espcomm_send_command: sending command payload
read 0, requested 1
warning: espcomm_sync failed
error: espcomm_open failed
error: espcomm_upload_mem failed
Good Eyes Trystan, I will make the connections and let you know.
Thanks all for the help
P.S. in the search for a solution I found this resource https://arduino-esp8266.readthedocs.io/en/latest/faq/a01-espcomm_sync-failed.html (included as someone may find it usefull in the future) I had the usb serial converter connected at one point yesterday but had nothing sensible coming back. In hindsight that should have been a hint that ESP connections were not right.
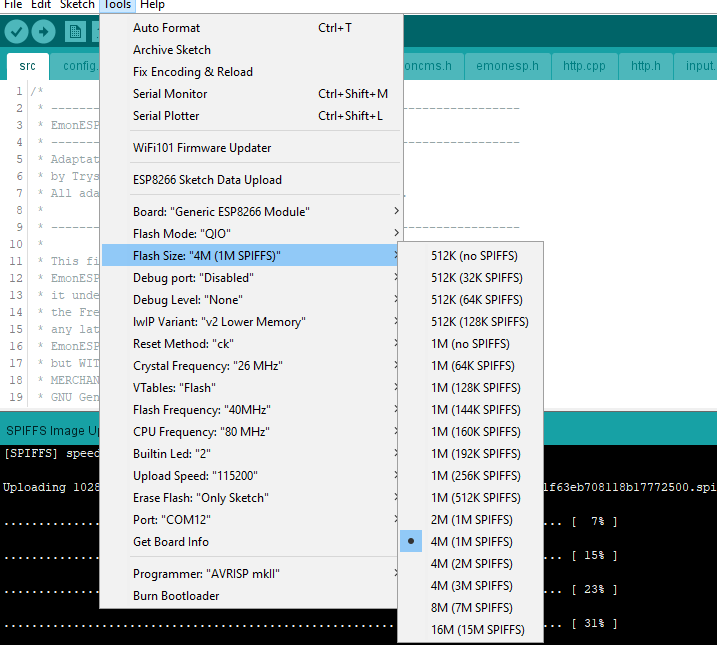
to upload the data part I had to change flash size to 4M (I belive 4 to be correct for the ESP-12-E) had a guess at the SPIFFS size at 1M. Not sure if this is correct, will edit if I find out.


