Hi folks,
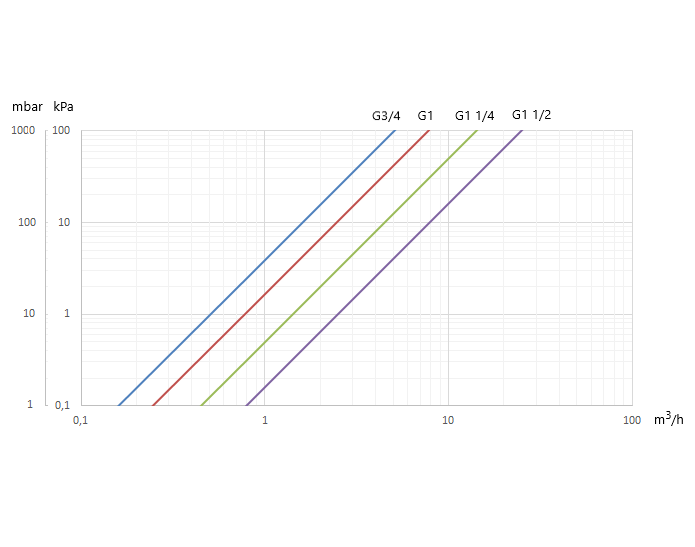
There have been a few questions on the Axioma E4 pressure drops. This topic is to clarify what the pressure drops are for designer / installers.
THESE are the official pressure drops for the composite body E4 range:
They match the pressure drops in the E4 instruction manual that is available here:
https://drive.google.com/drive/folders/1UNDO2Y7nWSXkSJrYWLOmE3dwSDCekFXL
There is also a spreadsheet here that calculates the Kv value, the pressure drops for you at various flowrates, and whether this is above the minimum staring flow / MID certified flowrate. (you can actually use these for system balancing - even the big ones will measure down to pretty low flowrates)
https://drive.google.com/drive/folders/1UOjGyHihaTwSCdvDzGnnVZzle-Zf7S8Y?usp=drive_link
The marketing department are to blame for the confusion. They copy pasted the E3 pressure drops into the E4 brochure / datasheet and they still haven’t updated it in spite of my asking. This is probably because in standard applications (district heating) the industry allows for 25 kPa at the rated flowrate and it doesn’t matter if the actual pressure drop is smaller - we’re probably the only folks who care!
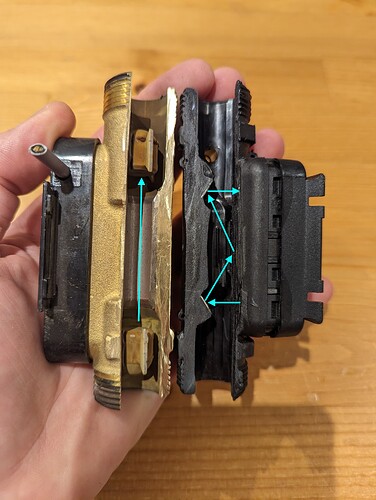
For those curious why the composite body version differs from the brass body version; and why the composite body version is actually the better product; here are some cutaways:
Left E3 with “straight shot” flow measurement path. Right: E4 with “W path” flow measurement path.
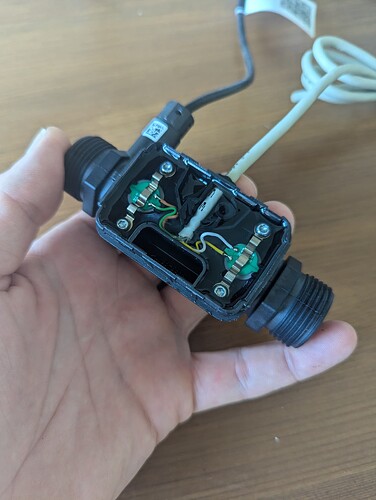
Below: E4 transducers mounted external to the flow sensing tube in a bath of waterpoofing goop
The E3 is a lump of coarsely-machined brass with a precision-machined stainless orifice tube inside it. The ultrasonic transducers are mounted in the flow and look “along” the flow through the orifice tube. (straight path sensor)
Advantages: you can be rough with your machining and it doesn’t matter which way around you mount the flow sensing element with respect to air/dirt management.
Disadvantages: you have to seal the wires where they go through the brass (always the weakest link) and there is not only a substantial pressure drop due to the presence of these transducers but they also act as a “strainer” for the big lumps of muck / stringy things floating around in systems.
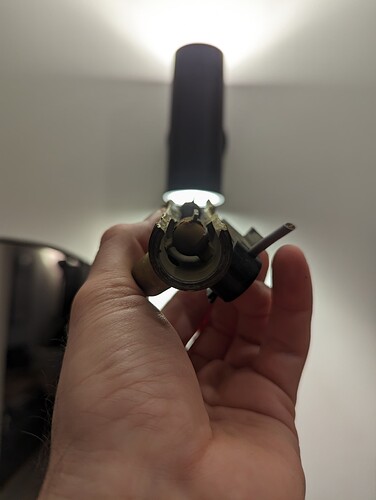
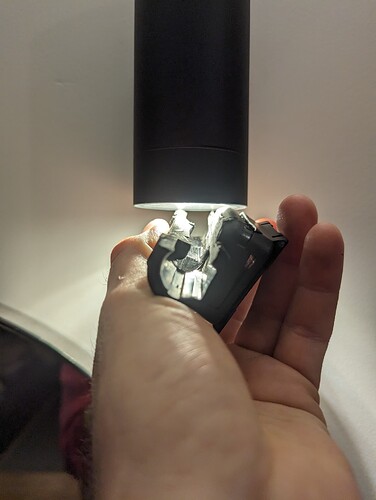
The E4 is a precision moulded piece of glass filled plastic. The transducers actually “look through the plastic” in much the same way that ultrasound looks through the skin and flesh at the baby (so there is no direct path for the water to enter the wires) and bounce off three stainless mirrors moulded into the body during manufacture for a W-path sensor. (now you know why their first ultrasonic water meter was called the W1…)
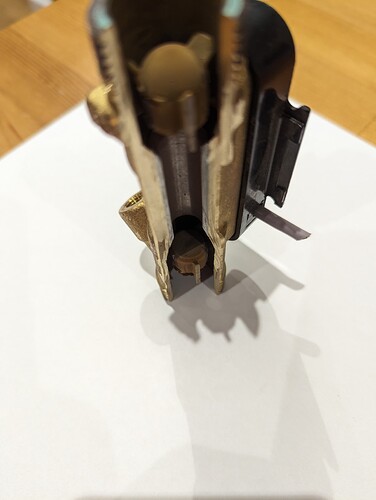
Advantages: no wires to seal; fewer gubbins in the way of the flow hence lower pressure drops for a given size/less places for stringy bits to get hung up on; quicker to manufacture
Disadvantages: harder to manufacture (you need to be VERY good at moulding/mirror placement etc), only rated for 90 deg and 16 bar (no issue for domestic heating), and more sensitive to orientation with respect to air/dirt (if mounted horizontally you want that W-path to look “across” the flow so that dirt doesn’t settle on the mirrors)
Here are a couple more photos that should make the “less tings to cause pressure drop / bung things up” for E4 vs E4 clearer:
I have asked marketing to update their promo materials again with the correct pressure drops. In the meantime - ignore the wrong copy-pasted pressure drops for the E3 meter in the E4 brochure; and use the ones in the manual please. ![]()
–
M
